
If you’ve wondered how to make Homemade Ramen Noodles, you have to try this! Through trial and error, I’ve developed a reliable recipe for making ramen noodles from scratch that works every time. And they freeze beautifully, so make a big batch to use in all of your favorite Ramen Noodle Recipes!
There’s a simple reason why it took me several tries to perfect this recipe: I’m terrible at scooping flour from a bag accurately. I learned this about myself long ago when it came to baking cookies, cakes, and bread. But it took me a few failed attempts at ramen noodles to realize that I needed the flour weight to have a reliable recipe.

This post may contain affiliate links. Please read our disclosure policy.
The first recipe I tried was from my friend, Lorraine, of Not Quite Nigella. Her recipes are reliably excellent and the ramen was no exception – the noodles tasted delicious! But sometimes the dough would come out of the pasta cutter as separate noodles, other times as a blob. Not a recipe problem, a flour scooping problem.
Then I came across a ramen noodle recipe from Lucky Peach and was excited because it had ingredient weights and a bonus science project of soda baked in the oven to create an alkaline salt, i.e., changing sodium bicarbonate to sodium carbonate. This sounded very official, so I tried it.
There was good news and bad news: the good news was that the ramen dough flowed easily through my pasta cutter; the bad news was that, when cooked, the noodles had such a strong alkaline flavor that we threw them away. If you’ve had cookies or rolls made with too much baking soda, you know the flavor I’m talking about.

Since the texture of the Lucky Peach ramen worked, but I loved the flavor of Lorraine’s noodles, I decided to try a combination. This is a true hybrid with elements of both recipes. I used all-purpose flour as recommended by Lucky Peach, but did away with the baked soda and used Lorraine’s combination of baking soda and egg to give the noodles that essential springy ramen noodle texture. A few tries gave me a reliable formula of flour weight to liquid volume.

As you’ll see in the video below, I used my stand mixer to stir and knead the dough. Let me warn you that this is a fairly dry dough and you’ll be giving your stand mixer a workout. You may even need to steady the mixing bowl as it kneads, i.e., don’t leave the room or you may end up with the mixer running and the bowl on the floor.
Of course you can knead the dough by hand, but know that you’ll break a sweat: knead for 5 minutes, let the dough rest for 20 minutes and then knead it again before refrigerating. Either way the noodle payoff will be worth it, I promise.
Once your dough is ready, you’ll roll it through a manual pasta machine – this is the one I have. Then use the same machine to cut the ramen noodles. You can either cook them immediately or freeze them for later.
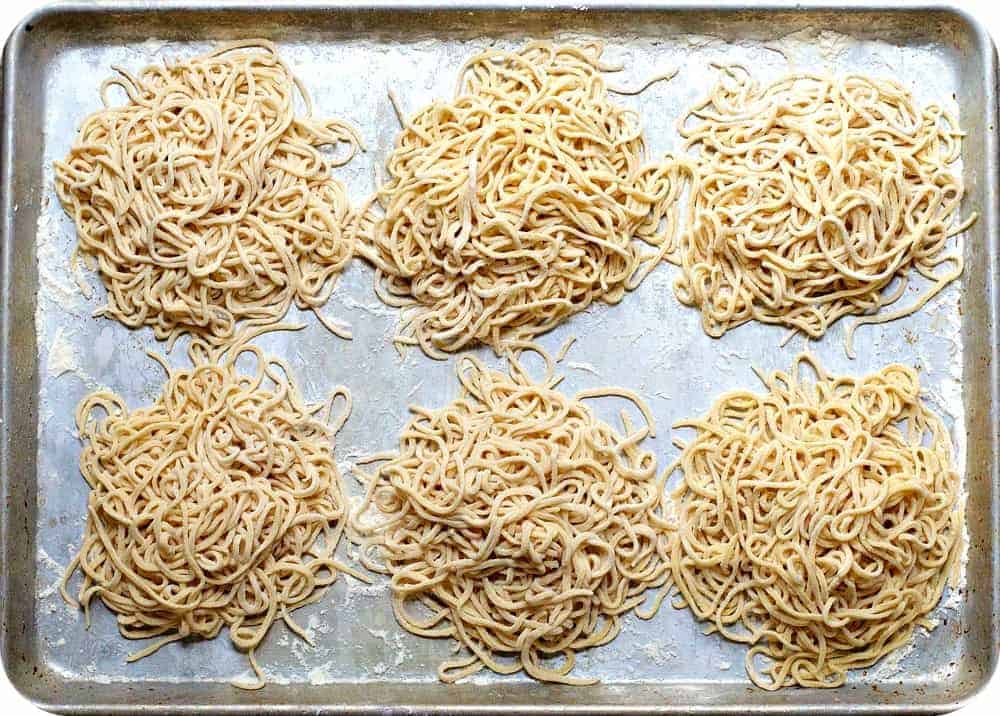
To freeze ramen noodles, place them on a floured baking sheet in loose mounds that are about 2-servings each, as pictured above. Cover and freeze until solid. Once frozen, carefully transfer to a gallon-size freezer bag or other lidded freezer safe container. No need to thaw before cooking.
This batch makes 8 to 12 servings, depending on how you use them (10-12 if you’re making soup, 8 to 10 for stir fry). I recommend trying them in this Pork Belly Ramen, Birria Ramen, Homemade Ramen (my easiest version), Shoyu Ramen, Miso Ramen, Shrimp Ramen or with Miso Ramen Broth or Shoyu Ramen Broth topped with crisped slices of pork belly or Chashu Pork, Menma and Soy Sauce Eggs.
How to Make Homemade Ramen Noodles
Step 1: Combine whisked dry ingredients and eggs in the bowl of a stand mixer with dough hook attached. Mix until combined; continue mixing to knead dough, 5 minutes or until dough is smooth.


Step 2: Wrap dough and refrigerate for at least 1 hour (but not more than overnight – see recipe note #3.).

Step 3: Dust baking sheet with flour and divide dough into 6 equal pieces.

Step 3: Run one piece through the thickest setting on a manual pasta machine. Repeat three more times, turning the dial to a thinner setting each time. Cut dough in half crosswise. Attach finest cutter to pasta machine and run dough through to cut. Dust with flour to coat and gently separate noodles and place on prepared baking sheet. Repeat with remaining dough.


Step 4: Cook noodles for 1 to 2 minutes in water or broth until cooked through. Note that you can also freeze the noodles – just add to boiling liquid directly from the freezer and cook about 30 seconds longer than when fresh.

Video
Ingredients
- 3 cups all-purpose flour 408g
- 1 teaspoon fine sea salt
- 1 teaspoon baking soda
- 2 large eggs beaten
- 1/2 cup warm water
Instructions
- Whisk together flour, salt and baking soda in the bowl of a stand mixer. Add eggs and warm water.
- Set bowl in place on a stand mixer and attach dough hook. Mix at the lowest speed until all ingredients are moistened. Increase speed one or two clicks and mix until dough comes together. Once a dough ball has formed, continue to knead with dough hook for 5 minutes, until dough is smooth. (Recipe Note #2)
- Turn dough out on to a floured surface and shape into a rectangle. Cover with plastic wrap and refrigerate for at least 1 hour (but not more than overnight – see recipe note #3).
- Dust a rimmed baking sheet generously with flour.
- Remove dough from refrigerator and divide into 6 equal pieces on floured work surface and cover loosely with plastic wrap. With your palm, flatten one piece into a rough rectangle about 1/2-inch thick; rub all over with flour. Feed one end through a manual pasta machine, beginning at the thickest setting (1). Turn dial to the next setting (2) and run dough through again. Repeat at the next two settings (3 and 4). (For a shorter ramen noodle, cut the dough in half crosswise before running through the pasta cutter.)
- Attach pasta cutting attachment and dust the blades lightly with flour. Run dough through finest cutter (spaghetti-sized ideally). (Recipe Note #4) Dust noodles with flour to coat and separate and place on prepared baking sheet. Repeat with remaining dough pieces.
- Cook noodles for 1 to 2 minutes in a generous amount of water or broth until cooked through. You can also freeze the noodles. They can be added to boiling liquid directly from the freezer and cook about 30 seconds longer than when fresh.
- Use noodles in your favorite soups and stir-frys!
Notes
- To knead the dough by hand: once you’ve stirred the ingredients together, turn out onto a floured surface; knead for 5 minutes, cover the dough and let it rest for 20 minutes; then knead again for 5 minutes then refrigerate.
- If dough seems to be taking too long to form a ball, don’t add more liquid. Instead, turn off the mixer and use your hands to press it into a ball then continue with recipe.
- As with all fresh pasta, the dough will start to oxidize and turn a green / gray if left in the refrigerator for 18 or more hours. So be sure to make the noodles and use or freeze before then, as directed in the post.
- If your noodles start to clump when cutting, check the attachment underneath to make sure that dough isn’t building up between the teeth. If dough is building up, use the dry brush that comes with manual pasta makers (or a dry pastry brush) to wipe away any residual dough. Be sure to coat each section of dough with flour before running through cutter to avoid this issue.
- This recipe serves 10-12 if you’re making ramen noodle soup. If you’re making a noodle stir-fry or other dish where noodles are the bulk of the dish, it will serve 8 to 10.
Nutrition
Nutrition information is automatically calculated, so should only be used as an approximation.


First time making ramen noodles with my son who spent a summer in Japan and was jonesing for “authentic” Ramen soup. used this recipe and they turned out great!
That’s fantastic, Mary! So glad you and your son enjoyed these!
You are amazing and thorough. I love your recipes because I can find the ingredients right away, they’re organized, easy to follow, and well structured. And, hey, your recipes are fabulous tasting! You make everything less daunting and complex. Pork Belly & Ramen excellent. Thanks
Thank you so much for your kind words, Donna! I’m so glad you’re enjoying the recipes!
I don’t have a stand mixer, can I use my food processor?
Hi Jane! Yes you can. In fact, I’ve made this dough a few times – you’ll need a large food processor to do a full batch at once – if yours is smaller (7 to 9 cups) do a half batch at a time. Have a look at this food processor pasta dough recipe for the basic method. I hope that helps!
thank you so much for this recipe
My pleasure, Jordan!
Seems like an awesome recipe to try but how would it work with all the chilling using a pasta and noodle extruder ?
Hi Patricia! Yes, I think an extruder would work just fine, though I haven’t tried it myself. If you do, please let me know how it goes.
Im really excited to try this out! My i have a group of friends i love to hang out with , and all of us want to try a bowl of actual ramen , like the ones you see in anime , but we cant find a restaurant that serves a decent bolw of ramen , so this helped me a lot! thanks a million.
My pleasure, Sofie! I hope you and your friends will love it.
Hi Marissa! I tried to make this tonight but my noodles just wouldn’t cut through my spaghetti cutter. I moved to the fettuccine setting and they half cut but I still had to break them apart. Then when I cooked they broke into pieces. I weighed my flour but I think my water was a tad over 1/2 cup. My dough was also a bit tacky when I finished kneading in the kitchen aid. Do you think it was too wet? Thanks so much the noodles still tasted great!
Hi Megan! hmm…it does sound like your dough was too wet (it shouldn’t have a sticky / tacky consistency), which I’m guessing is the culprit both for the cutting issue and the noodles breaking when you cooked them. I’m glad you enjoyed the noodles, but sorry things didn’t go smoothly!
What if you don’t have a pasta roller/cutter? Anyone have success with rolling and cutting by hand?
Hi Marian – I think these would be a challenge to roll and cut by hand, but there are a few readers who have done it with good success. Just be ready for an arm workout! 😉
I absolutely LOVE ramen noodles and have bought the little cheap packs from the grocery store for years. Now that I’ve found your recipe, I intend to try making them from scratch with the new attachment I recently ordered for my Kitchenaid. However, I also have a great bread machine. Can I make this dough using its dough setting and do you know if it’ll turn out similarly? Thanks again!
Hi there, Jennipher! That’s a great question, but I haven’t made this dough in a bread machine and I don’t own one. If you try it, please let me know how it goes!
I was skeptical, so I only made 1/2 batch.
I was already at a disadvantage since I didn’t want to take out my stand mixer, and my food processor blade had gone missing. SO, I got lazy improvised and put the ingredients into a quart size zipper storage bag (I whisked the eggs with the warm water and sifted the soda and salt into the flour first) and mixed and kneaded it through the bag. 5 min, let rest 20, then again 5 min, all in the bag. Rest 1 hour in fridge.
The dough looked perfect. Too perfect…, cuz I’m master of unlucky when trying new recipes. I rolled it flat and it seemed kinda tough compared to regular pasta, so I just folded the rough edges in to get a smooth outer edge.
I rolled it to size 4, and because I was nervous, I chilled it in the fridge a bit before running it through the cutters. By this time it was late, and my mate said he wasn’t hungry, so I floured the cut noodles and put them in the fridge.
This afternoon, I wanted to preview the noodles (so I could chuck ’em before my mate noticed, if they turned out bad. Yes I have no faith…)
The sample I cooked was delicious straight out of the salted water, in about 2 minutes, It had a great chew, a great flavor, It tasted better than the fresh noodles I buy from the Asian Food Mart down the street. I can’t wait to make dinner and brag that my homemade ramen tastes better than my mate’s packaged ramen! LOL I don’t think he’ll complain! This is really Tasty!
Thanks a bundle for the effort you put into this recipe and the detailed instructions that helped. I needed a success this week, and this fit the bill!
~Cheers!
Love all of your cooking notes, Metqa. So glad everything turned out and that the noodles were a hit!
Im wondering if you have a preference to the manual pasta roller. Can you use the Kitchenaid pasta attachment?
Hi Marlene! Yes, you can absolutely use the Kitchenaid pasta attachment.
I’m thinking of dehydrating the noodles?
Anyone do this yet?
Hi, Tina! You can dry / dehydrate these noodles as you would other egg noodles.
Nice recipe! I had success with it…thank you for sharing
That’s so great to hear, Severina! Thank you.