This post may contain affiliate links. Please read our disclosure policy.
Make homemade Tostada Shells in minutes with this easy recipe – just 2 ingredients! They’re so snappy crisp that you’d never guess that they’re baked not fried. I’ll show you a simple technique that might surprise you, to make sure they are evenly cooked and never have curled edges.

Those tostada shells piled into plastic sacks that you’ll find on grocery store shelves have never appealed to me. How long ago were they fried? But, until now, I’d had mixed results making them at home.
The Secret to Flat, Crispy Shells
Here’s the trick: Brush corn tortillas with oil and arrange in a single layer in a single layer on a baking sheet. Then, before baking, invert an oven-safe wire rack over the tortillas. The result: flat and perfectly crisp tostada shells. I can’t take credit for the technique, it comes from the clever people at Cooks Illustrated. But I can verify that it works beautifully, though I did need to adjust the recipe and suggest you do the same.
They called for baking the corn tortillas for 15-18 minutes, which led me to not one, but three batches burned to a crisp (I won’t bore you with the details. 😉 ). These go from heavenly crisp to inedibly burned in a matter of seconds, so you need to keep a vigilant eye. I found that the best method was hot and fast, in the upper and lower thirds of the oven for a total of 8 minutes, switching and rotating the baking sheets halfway through.
Serve With
Mix and match toppings like Homemade Refried Beans, Carne Asada, Chicken Tinga, Pico de Gallo, and Easy Salsa Guacamole. They make a quick and satisfying meal and are a great way to feed a hungry crowd with toppings served family style.
More Tostada Recipes
How to Make Tostada Shells
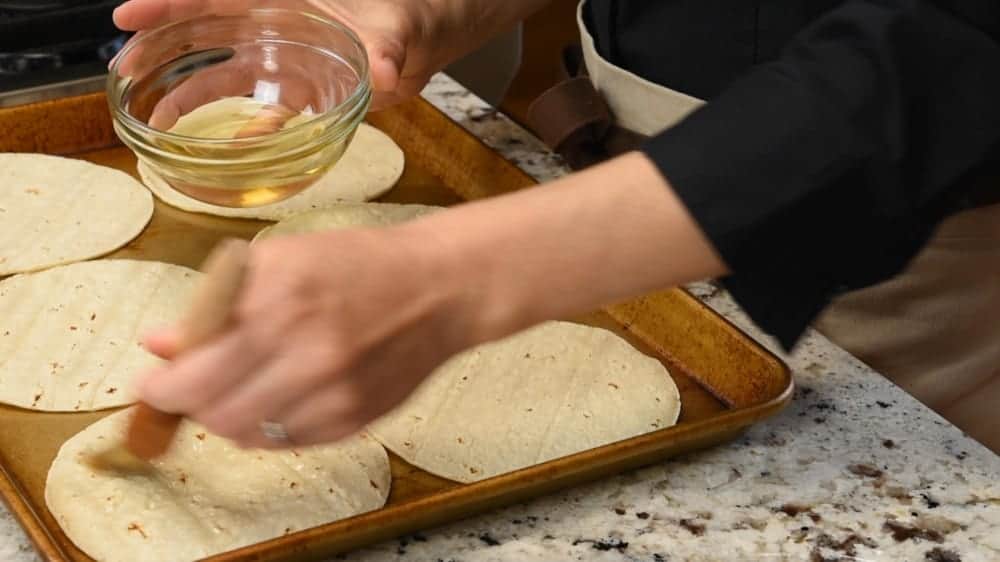
Arrange 12 corn tortillas in single layers on 2 baking sheets (6 tortillas per sheet). Brush tortillas on each side with avocado or other high heat oil.

Invert an oven-safe wire rack over tortillas in each baking sheet.

Bake in the upper and lower thirds of a 450˚F oven for a total of 8 minutes. Switch and rotate baking sheets after 4 minutes.

Remove from oven and let cool. Serve.
Tostada Shells

Video
Equipment
- 2 rimmed baking sheets
- 2 oven safe wire racks
Ingredients
- 12 6-inch corn tortillas
- 1/4 cup avocado oil or other high heat oil
Instructions
- Arrange oven racks to upper and lower-thirds of oven. Preheat oven to 450˚F.
- Arrange corn tortillas in a single layer on 2 rimmed baking sheets, 6 per sheet. Brush one tortilla on both sides with oil; repeat with remaining tortillas.
- Invert an oven safe wire rack over the tortillas on each baking sheet. Bake on upper and lower-third oven racks for 4 minutes. Switch and rotate each baking sheet and bake for 4 minutes more, or until crisp and golden brown. (Note that the tortillas will continue to crisp once they're out of the oven so keep a careful eye to not overcook.)
- Remove from oven and let cool. Serve as desired.
Notes
- Use tortilla shells made simply with corn, lime, and salt – no preservatives.
- Store leftover tostada shells at room temperature in an airtight container or resealable plastic bag for up to one week.
Nutrition
Nutrition information is automatically calculated, so should only be used as an approximation.


I used thin tortillas and this recipe worked perfect!!
That’s so great to hear, Lisa!
Why the Wire rack question: ANSWERED!
My apologies!
Place an oven-safe wire baking rack on top of the tortillas to keep them flat (the little “feet” on the wire rack should be pointing up). If you don’t have a rack, the shells will curl some while baking.
Hi Charlie! Yes, exactly!
Great tips here! Tostadas are a great way to mix up the taco night routine. Definitely putting this on the list ASAP!
Thanks for the tip, it is a good one that I will use soon.
I made It my way with your Idea
2 flower tortillas no oil
I used instant pot trivets to hold them down
middle oven 8minutes then turn 4 minutes at 450
Hi Lee! I’m glad you found the recipe helpful.
Sorry but I’m clueless.
What is the purpose of placing the wire racks on top of the corn baking tortillas?
This was genius. Worked like a charm, thank you!!
So glad you enjoyed these, Stephanie!