
With just a few ingredients and 30 minutes, salmon nigiri brings sushi-bar quality to your kitchen. No fancy tools or complicated rolling required.
This post may contain affiliate links. Please read our disclosure policy.
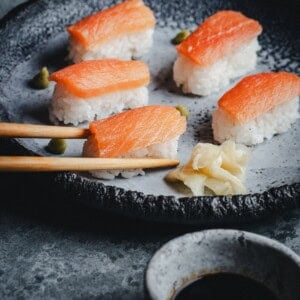
Making Salmon Nigiri at home might look impressive, but it’s surprisingly simple. I love all kinds of nigiri, but if I had to choose just one, this would be it. Something about the combination of rich, buttery salmon on perfectly seasoned rice always sounds good. To make this, you just need two things: best quality salmon (make sure it’s labeled for raw consumption – sushi or sashimi-grade) and a knife sharp enough to make clean slices.
Don’t worry about getting the techniques perfect right away. I’ve included detailed photos of exactly how to slice the fish and shape the rice along with a step-by-step video to take out the guesswork. The rice shaping gets easier with each piece you make. I think what I enjoy most about making nigiri at home is how it changes up my usual cooking routine. I hope you’ll feel the same.
Table of Contents
Recipe at a Glance
- Hands-on time: 30 minutes
- Total time: 55 minutes
- Yield: 10 pieces
- Skill level: Beginner-friendly
Salmon Nigiri Ingredients
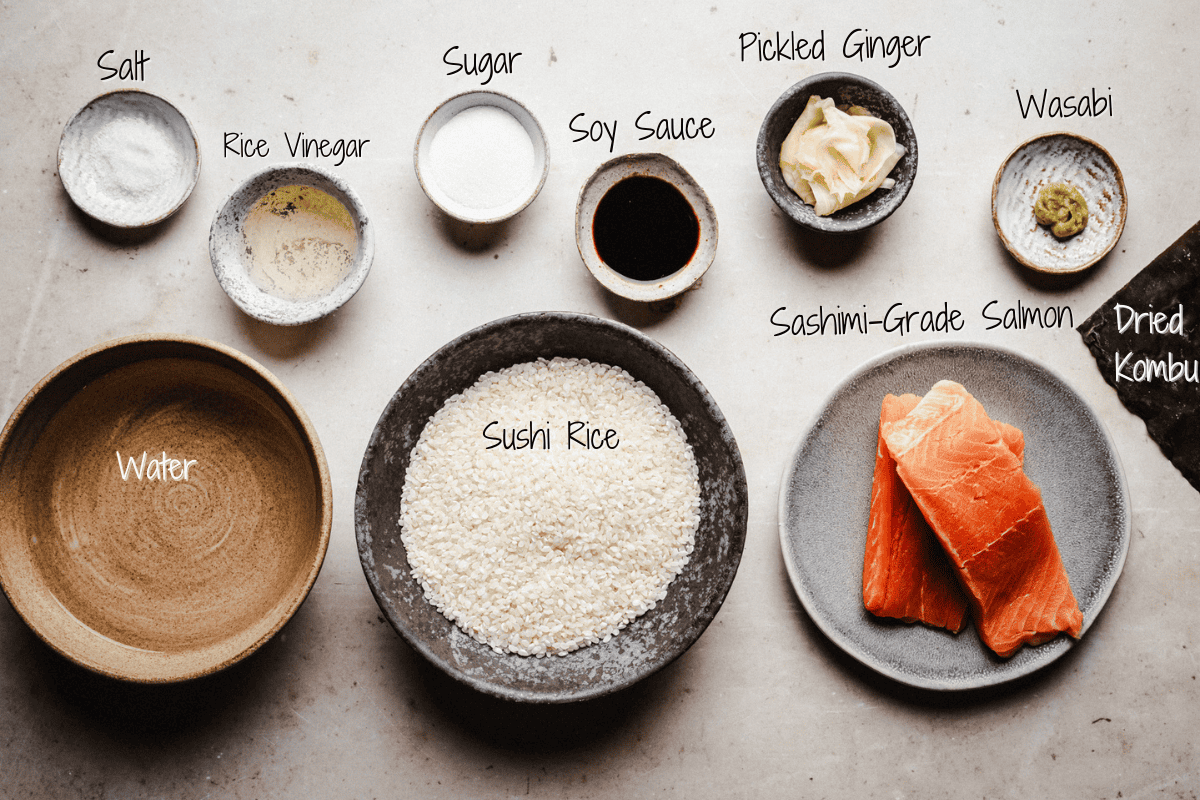
For the Sushi Rice:
- Sushi Rice: Short-grain white rice, known for its sticky texture when cooked. Look for a package labeled “sushi rice”.
- Water: Use filtered water, if possible.
- Rice Vinegar: Unseasoned rice vinegar adds a light, clean tang to the rice. Avoid “seasoned” versions with added sugar and salt.
- Granulated Sugar or Honey: Both balance the vinegar’s acidity. I often use honey for a subtler sweetness, but granulated sugar works well too.
- Fine Sea Salt: Fine sea salt dissolves quickly and evenly, with a cleaner flavor than table salt.
- Dried Kombu: You can find this dried seaweed in Asian markets or in the Asian food section at many grocery stores. If it’s in strips instead of squares, just use a few strips.
For Making the Nigiri:
- Sashimi-Grade Salmon: Look for bright, translucent flesh with clean ocean smell. The color should be vibrant orange-pink without gray spots. Look for farm-raised Atlantic salmon that’s been flash-frozen to sushi standards, typically labeled ‘sashimi-grade.’
- Wasabi: The prepared paste in tubes works well for home sushi making.
- Pickled Ginger: You’ll find this in jars in the Asian food section – look for the natural pale pink kind rather than the bright pink artificially colored version.
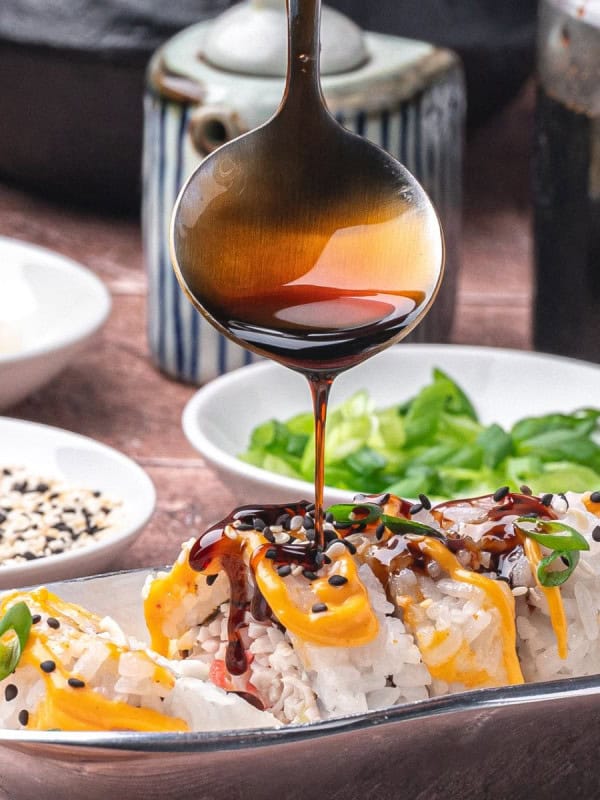
- Soy Sauce: Choose a good-quality Japanese soy sauce that won’t overpower the subtle sweetness of the salmon.
Why This Recipe Works
- Rice ratio tested: The vinegar, sugar, and salt mix is balanced to highlight the salmon, not compete with it.
- Grain-wise slicing: Slicing salmon with the grain preserves its buttery texture when eaten.
- Right-size portions: About 15 grams of rice and 15–18 grams of salmon per piece keeps the ratio just right.
- Beginner-friendly shaping: Wet hands and a little wasabi help everything stick without over-handling.
How to Make Salmon Nigiri
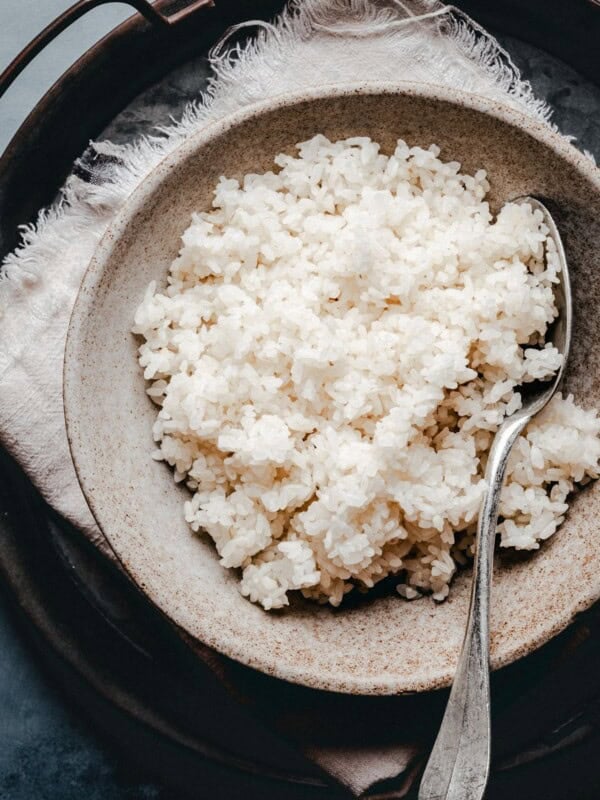
1. Make the sushi rice
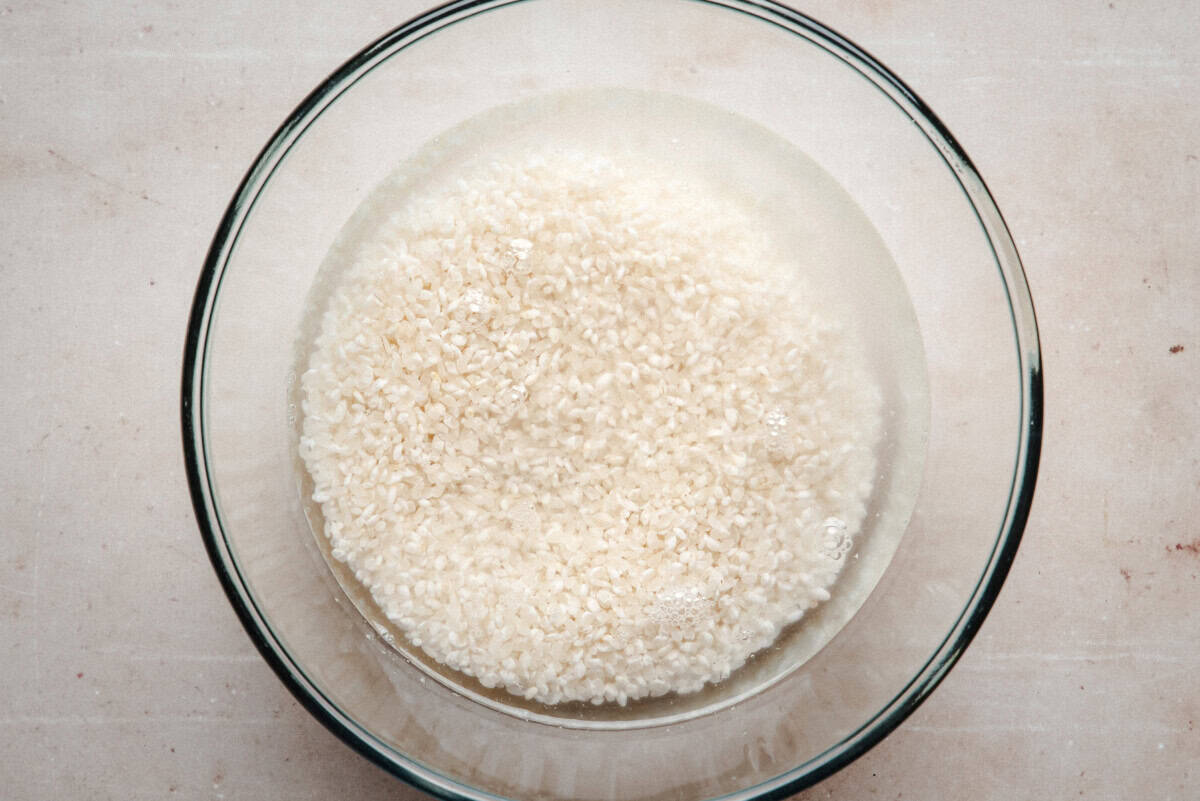
Rinse the rice under cool water until it runs clear. Soak for 15 minutes, then cook with kombu. Once cooked, let it steam, then remove kombu and gently fold in the vinegar seasoning. Cover with a damp towel and let cool to room temperature.
2. Slice the salmon; shape and assemble
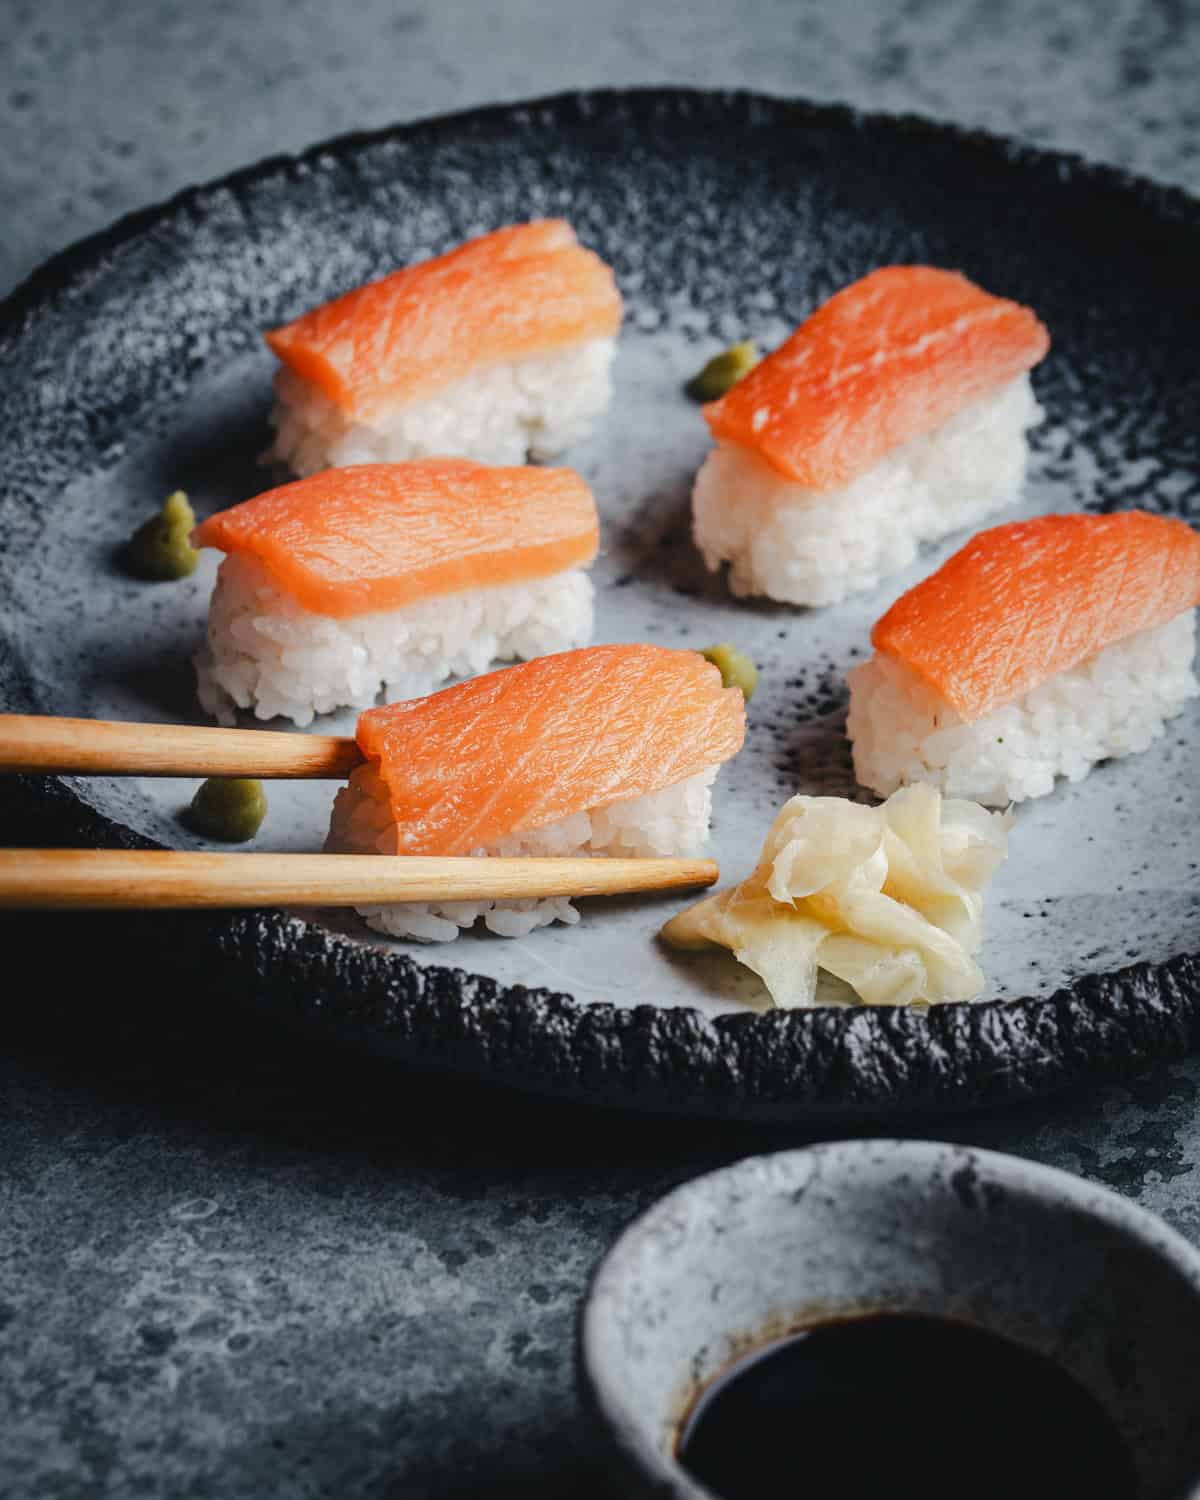
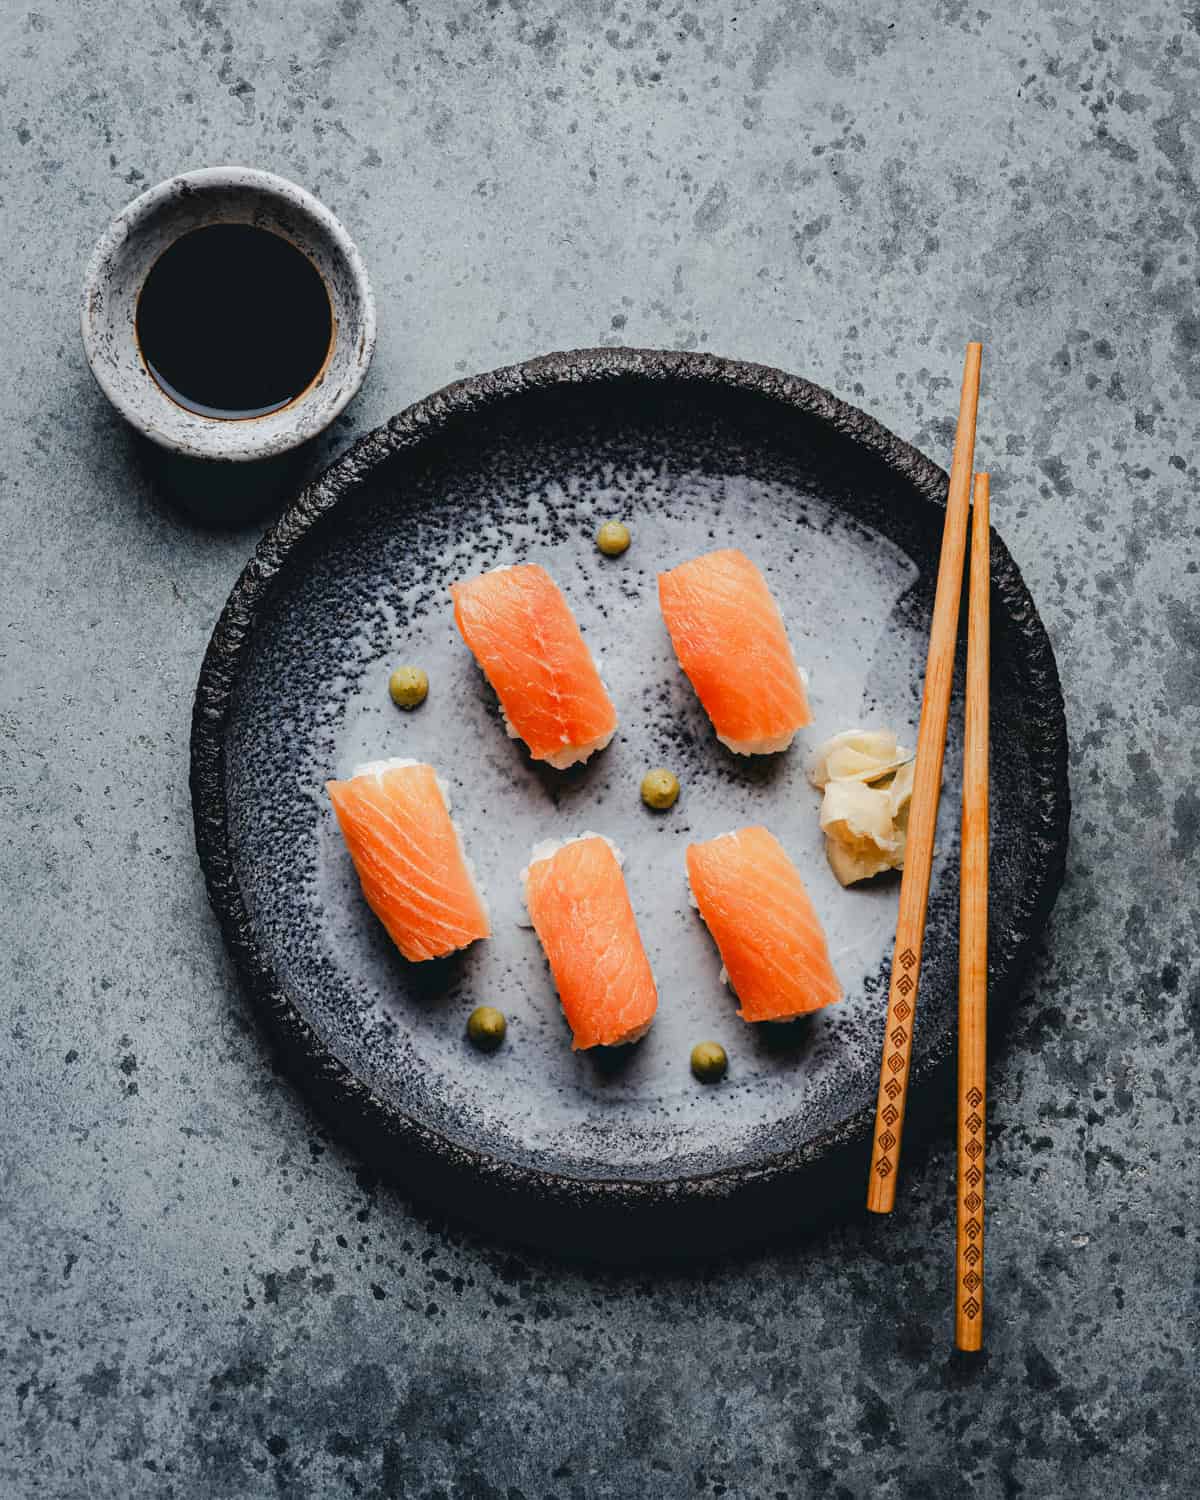
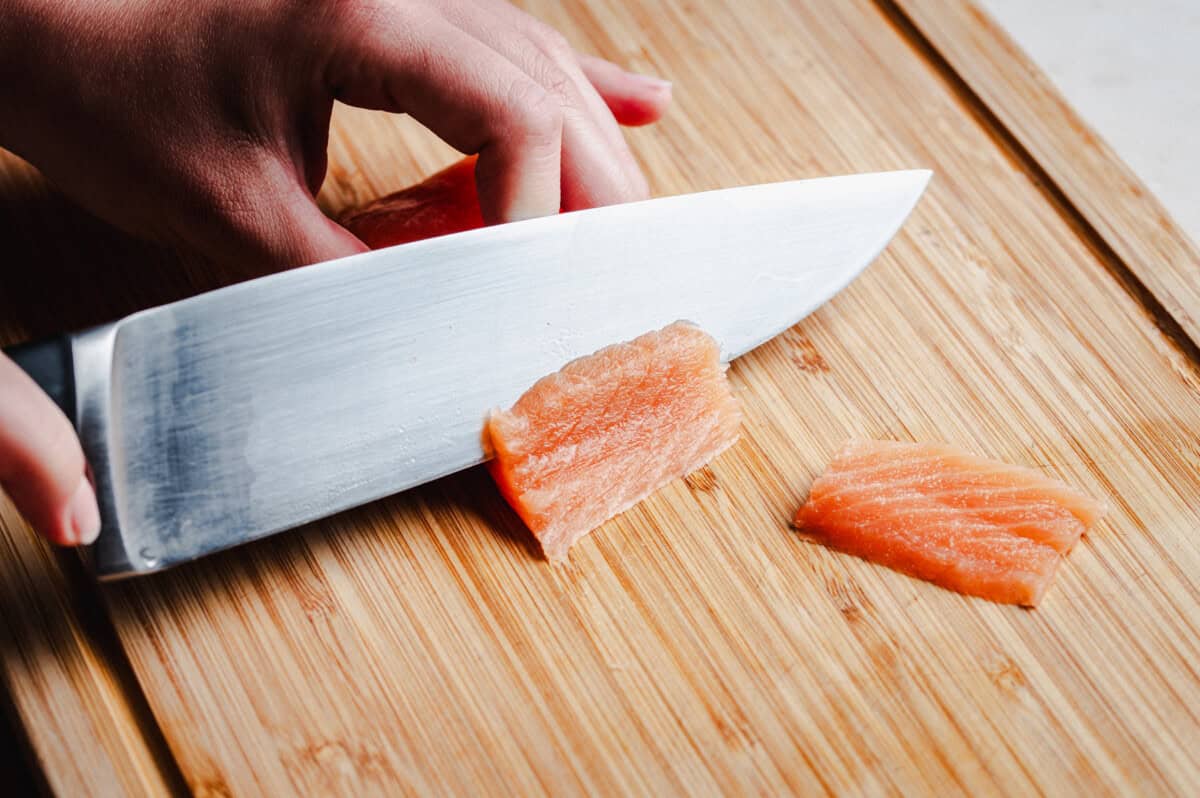
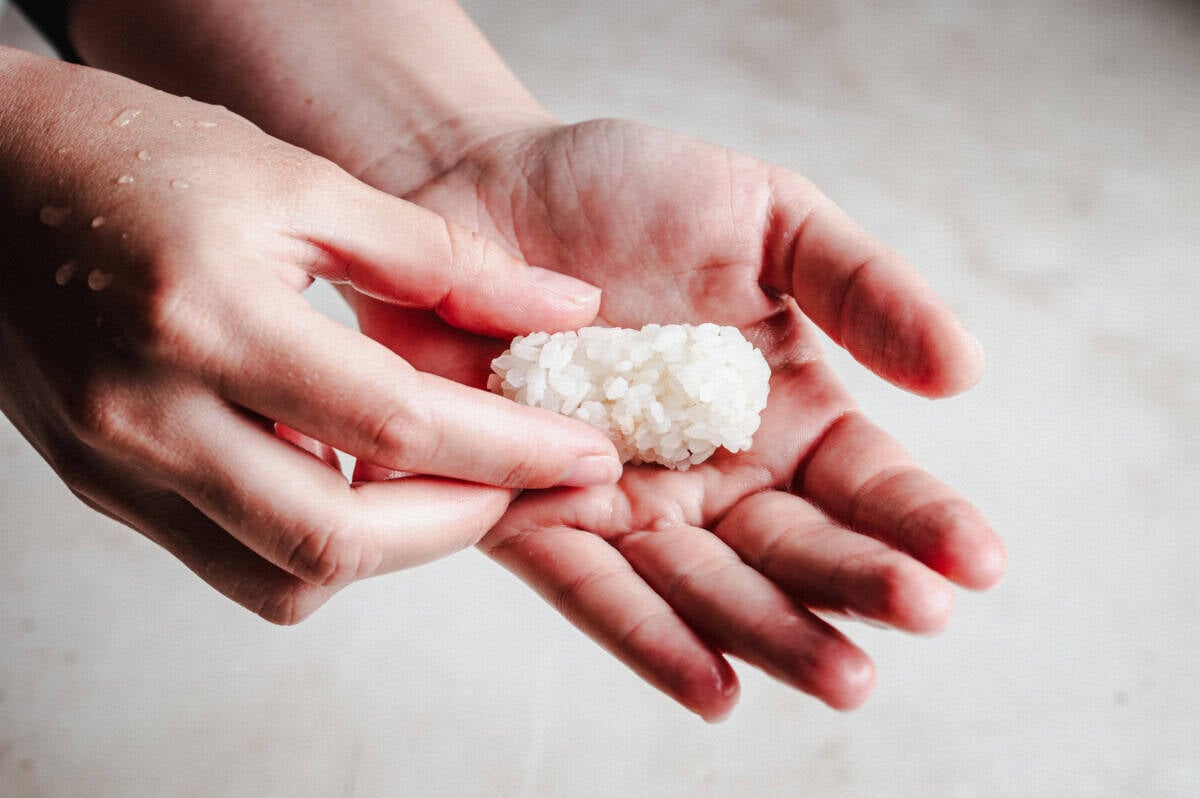
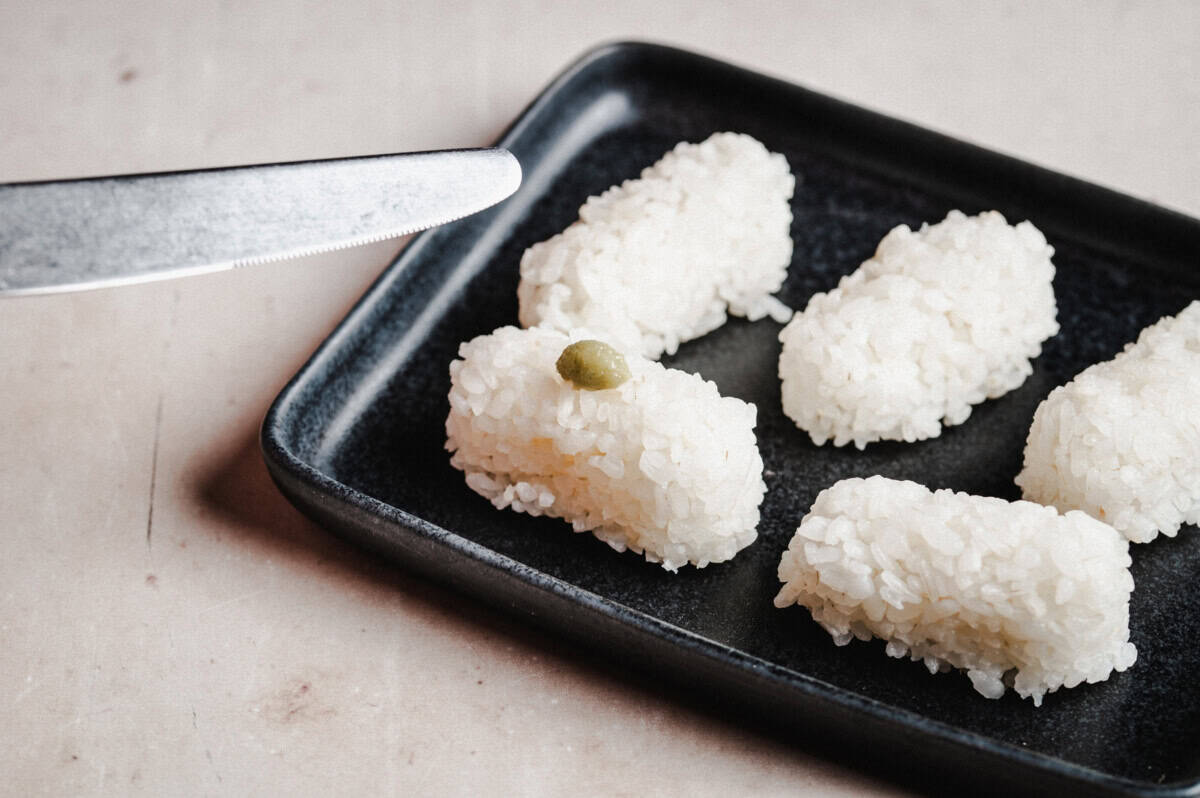
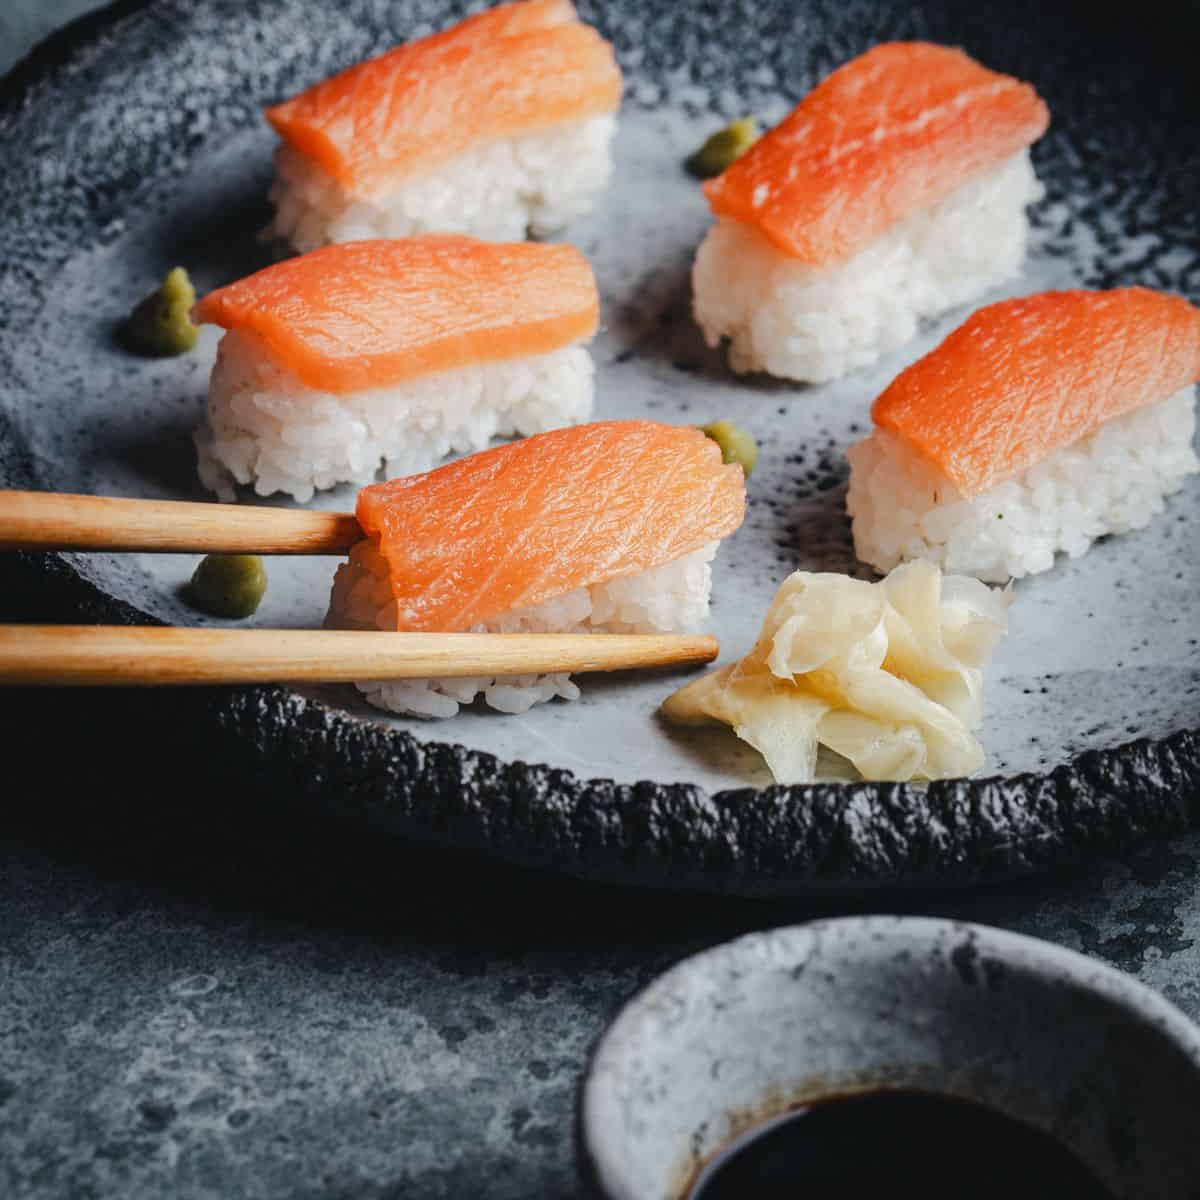
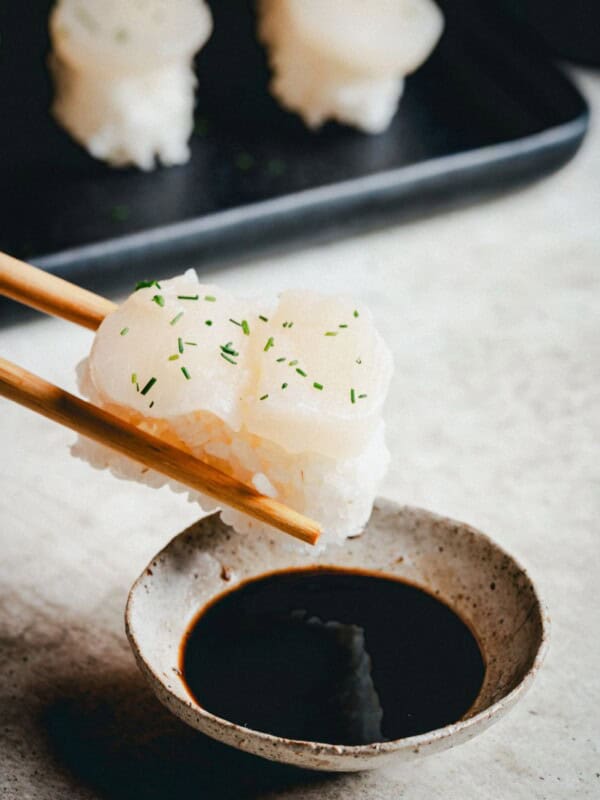
Keep salmon chilled until just before slicing. Use clean tweezers to remove pin bones. Trim away dark or fatty edges. Slice with the grain into 1/8-inch-thick pieces using smooth, angled strokes. Aim for pieces that drape over the rice but aren’t too thick. With damp hands, scoop a heaping tablespoon of rice and gently shape into an oval. Dab with a touch of wasabi, if using. Lay a slice of salmon over the top and press lightly so it sticks. Serve immediately with pickled ginger, soy sauce, and extra wasabi on the side.

Pro Tips
- Keep Salmon Cold: Refrigerate the salmon until just before slicing. The colder the fish, the easier it is to get clean, precise cuts.
- Watch for Pin Bones: Run your fingertip along the flesh before slicing to detect any remaining pin bones. Remove them with tweezers so they don’t surprise anyone.
- Slice with the Grain: Unlike tuna, salmon should be sliced with the grain (parallel to the fat lines) for the best texture when eaten.
- Make Thinner Slices: Salmon’s rich, buttery texture means thinner slices (about 1/8 inch) work better than thicker cuts, which can feel too heavy.
- Less Wasabi Works Better: Salmon’s delicate flavor can be easily overwhelmed, so use about half the wasabi you might with stronger fish.
- Cut Away Dark Areas: The darker portions along the center line of salmon have a stronger flavor. Trim these away for the cleanest-tasting nigiri.
Recipe Variations
- Add Thinly Sliced Avocado: For a modern twist, add a paper-thin slice of ripe avocado between the rice and salmon. The creamy texture pairs beautifully with salmon.
- Salmon Roe Topping: Add a small spoonful of salmon roe (ikura) on top of each piece for an extra burst of flavor and striking presentation.
- Yuzu Kosho Option: A tiny dot of yuzu kosho (Japanese citrus chili paste) instead of wasabi offers a bright, citrusy heat that complements salmon wonderfully.
Storage and Make Ahead Options
- Sushi Rice: The rice is best used within 4 hours of making it. Keep it at room temperature covered with a damp cloth – never refrigerate it as this ruins the texture.
- Leftover Salmon Nigiri: Salmon nigiri is really best eaten fresh. Leftovers can be stored up to 24 hours in the refrigerator, but the rice will firm up and won’t have the same texture.
- Extra Salmon: If you have unused salmon, wrap it tightly in plastic wrap and then in foil to minimize air exposure. Store in the coldest part of your refrigerator and use within 24 hours.
- Prep Ahead Option: If you want to prepare components ahead of time, make the sushi rice up to 4 hours before (keep at room temperature under a damp cloth) and slice the salmon just before assembling the nigiri.
FAQ
Look for labels like “sushi-grade” or “sashimi-grade.” Most farm-raised Atlantic salmon is safe if flash-frozen at −20°C for 7 days or −35°C for 15 hours to kill parasites.
Use a 30-degree angle and cut with the grain.
About 15 grams of rice and 15–18 grams of salmon per nigiri is the ideal balance.
It may be too dry or overmixed. Keep your hands damp and shape gently. Don’t pack it too tightly.
No. Long-grain or jasmine rice won’t stick properly and will fall apart. Use short-grain sushi rice.
I think Salmon Nigiri is a great entry point into homemade sushi. The rich, buttery texture of good salmon is forgiving in a way other fish aren’t – even slightly imperfect cuts still deliver that melt-in-your-mouth experience. I love watching people’s reactions when they try these and realize that salmon this fresh doesn’t need fancy treatment to be delicious. Once you taste the difference between just-made salmon nigiri and anything sitting in a refrigerated case, you’ll wonder why you waited so long.
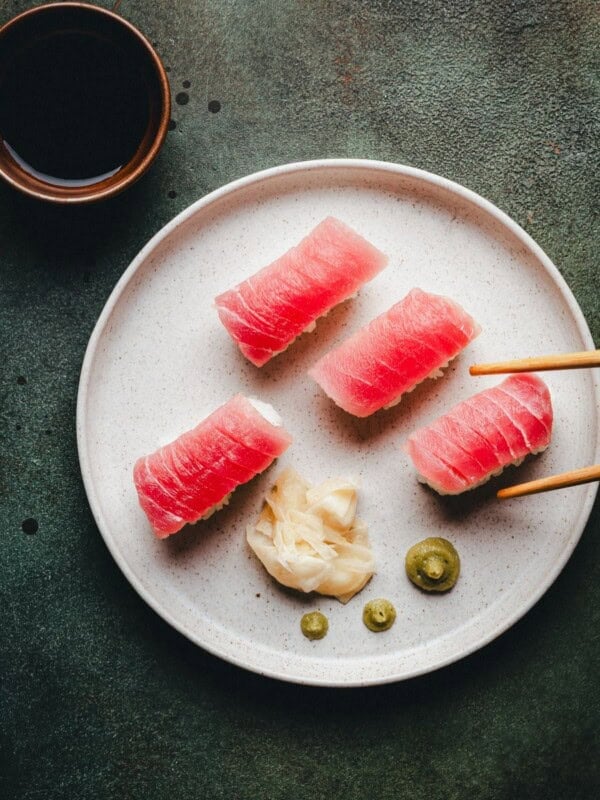
More Essential Sushi Recipes
Video
Ingredients
For the Sushi Rice
- 1 1/2 cups sushi rice (short-grain white rice)
- 1 2/3 cups water
- 3 tablespoons rice vinegar
- 4 teaspoons granulated sugar or 1 tablespoon honey
- 3/4 teaspoon fine sea salt
- 1 piece dried kombu 4-by-4-inch piece
For Making the Nigiri
- 1/2 pound sashimi-grade salmon
- wasabi to taste
- pickled ginger for serving
- soy sauce for serving
Instructions
To Make the Sushi Rice
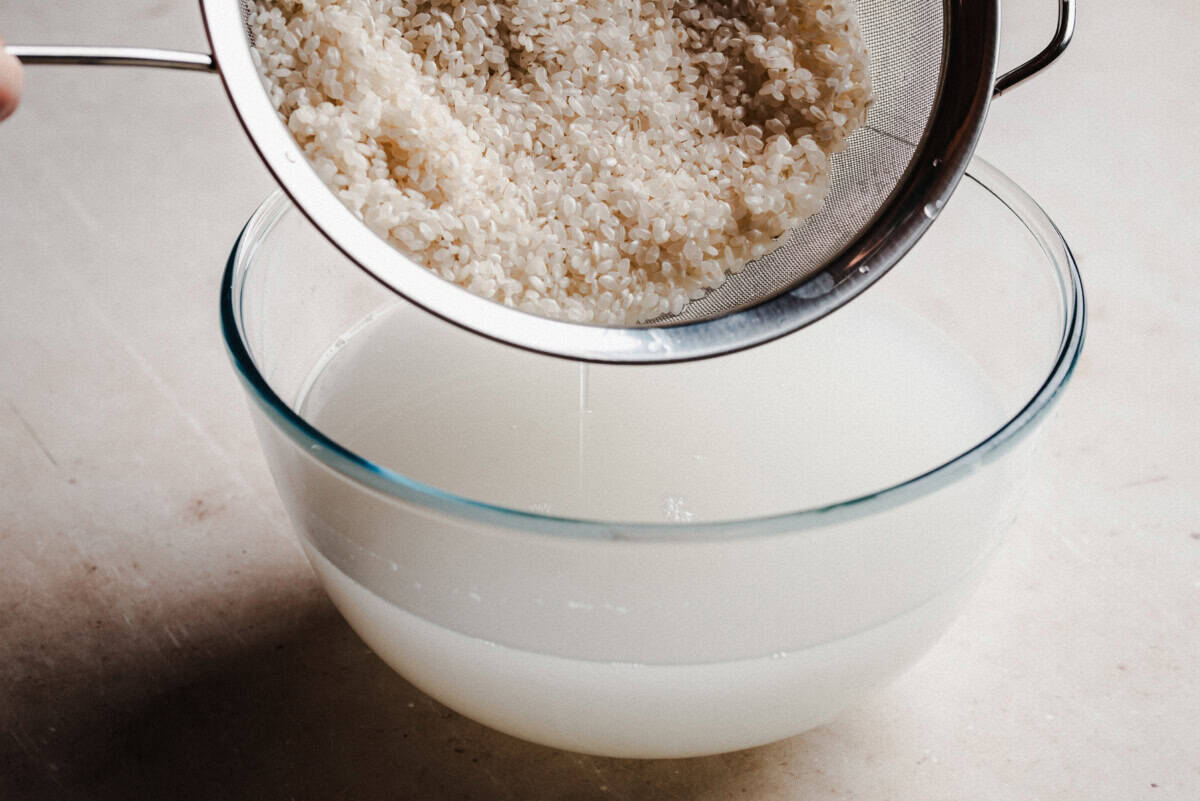
- Place the rice in a fine-mesh strainer set over a bowl. Rinse under cool water, stirring gently with your fingers. Once the bowl fills with cloudy water, lift the strainer and pour it out. Repeat this process, refreshing the water each time, until it runs clear.
- Transfer the rinsed rice to a medium bowl and add the measured water. Let it soak at room temperature for 15 minutes.
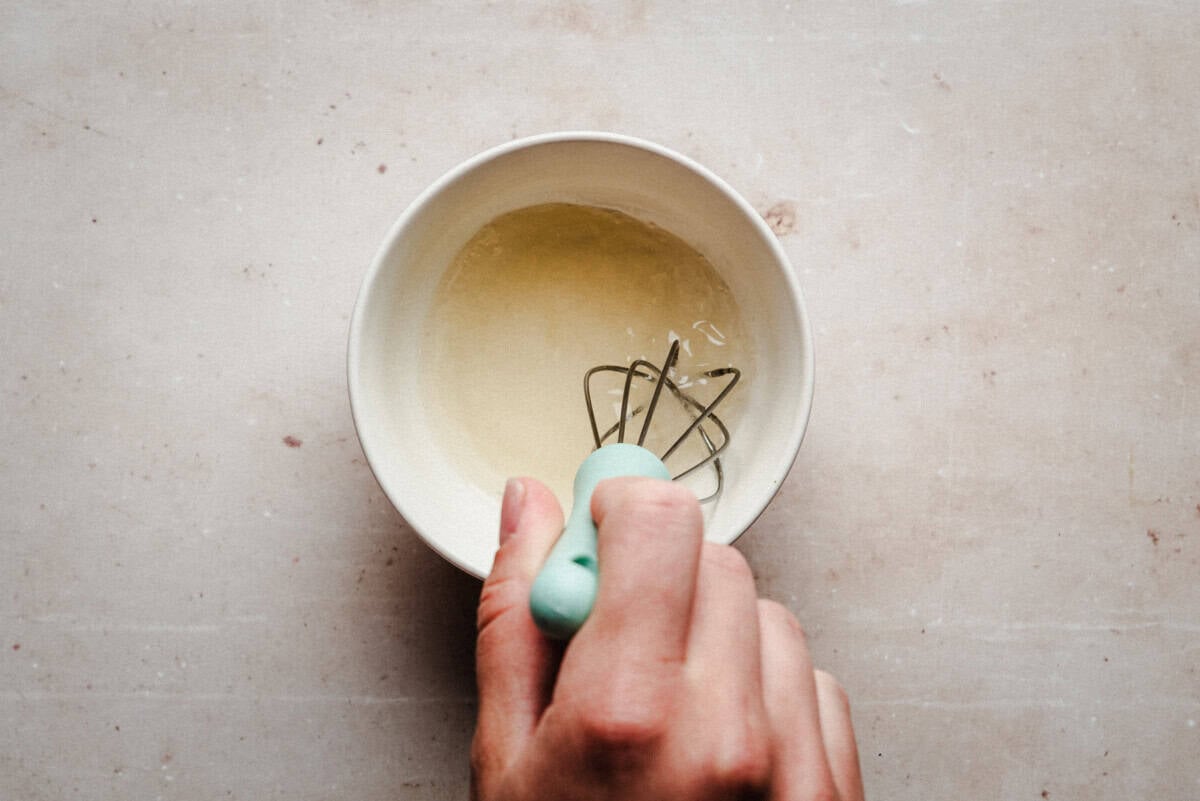
- While the rice soaks, stir together the rice vinegar, sugar, and salt in a small bowl until fully dissolved; set aside.
- Pour the rice and its soaking water into a heavy-bottomed saucepan. Add the piece of kombu, cover, and bring to a boil over high heat. As soon as it boils, reduce the heat to low and cook for 10 minutes. Once the water is absorbed, take the pot off the heat, place a clean kitchen towel between the lid and the pan, and let it steam for 10 minutes.
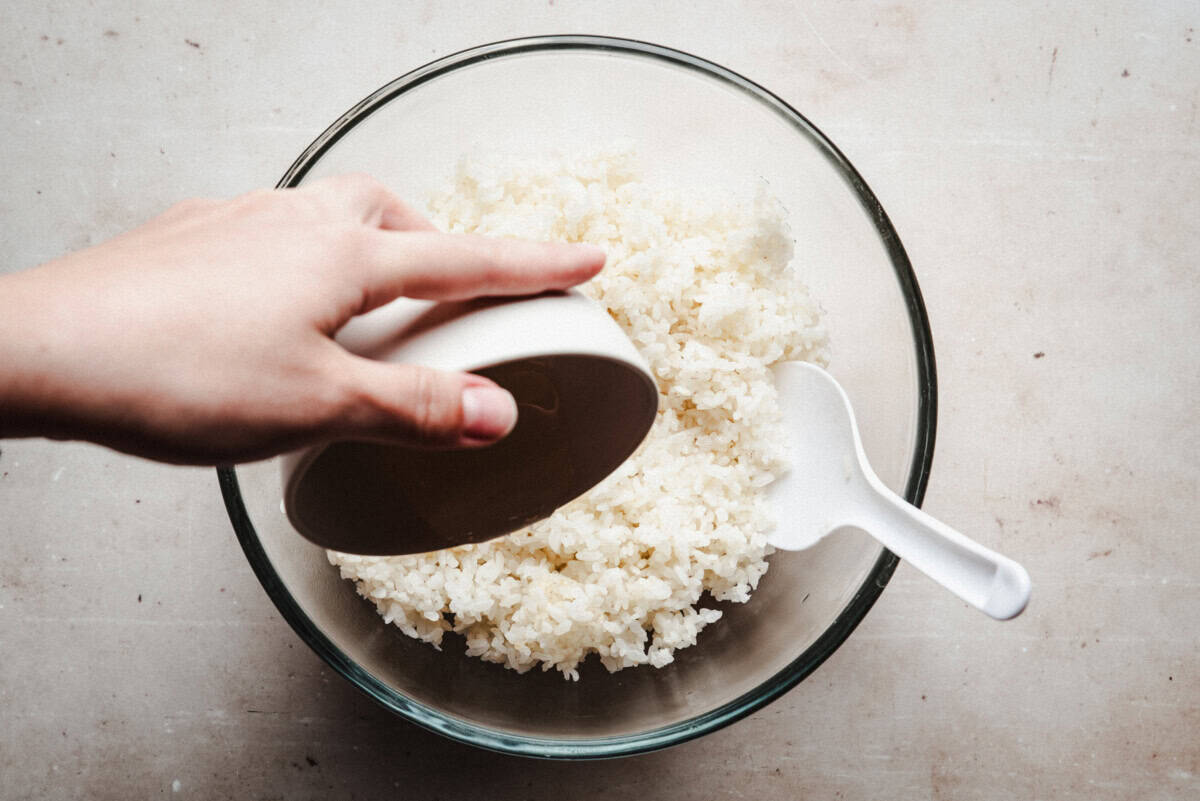
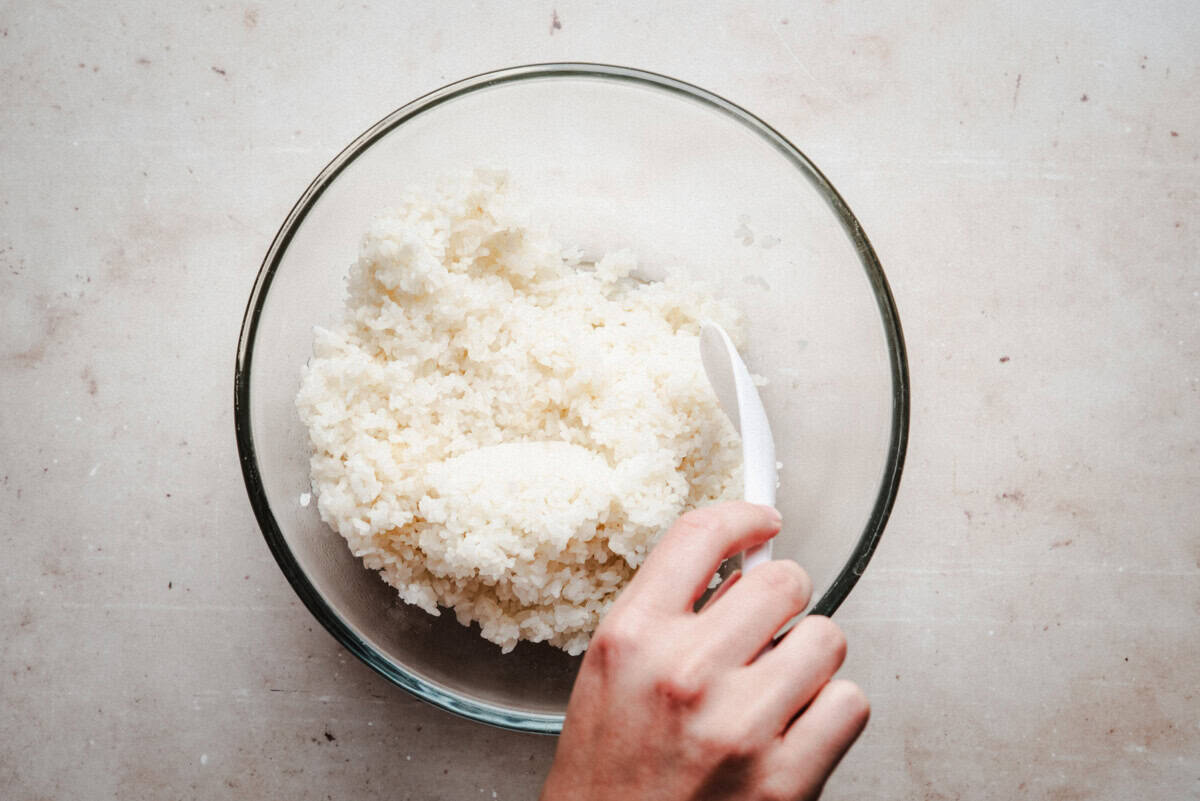
- Remove and discard the kombu. Transfer the rice to a wide bowl and drizzle with the vinegar mixture. Use a rice paddle to gently fold it through the hot rice, being careful not to press or stir too hard. Cover the bowl with a damp cloth and let the rice cool to room temperature before forming your nigiri.
To Make the Salmon Nigiri
- Start with skinless, sashimi-grade salmon and make sure it’s well-chilled. Check for and remove any pin bones with clean tweezers, then trim away any gray or fatty areas along the edges. Keep the fish cold as you work. Cut across the grain into thin slices, about ⅛ inch thick, using smooth, even strokes. Slightly angle the knife to give each piece more surface area so it rests neatly on top of the rice.
- With damp hands, scoop a heaping tablespoon of rice (about the size of two fingers pressed together) and gently shape into an oval mound.
- If using, spread a small dab of wasabi over the center of the rice before topping with a slice of salmon. Press the fish lightly into place, just enough to help it stick without flattening the rice. Transfer to a serving plate.
- Continue with the remaining rice, salmon, and wasabi. Add pickled ginger to the side of the plate or serve it in a small bowl, and include a shallow dish of soy sauce for dipping. Serve immediately. If needed, cover and refrigerate briefly, but know the texture is best right away.
Notes
- If you’re using honey instead of sugar, use less. A little less goes a long way.
- Don’t refrigerate the rice before shaping, it will firm up and lose its ideal texture.
- Nigiri is best the day it’s made. The rice dries out and the fish loses its silky texture if stored too long.
Nutrition
Nutrition information is automatically calculated, so should only be used as an approximation.


it tatses good
I’m so glad you enjoyed it!