With just 30 minutes and a few ingredients, Tuna Nigiri brings restaurant-level sushi to your kitchen. No mat or rolling skills required.

This post may contain affiliate links. Please read our disclosure policy.
Making Tuna Nigiri at home might seem like crossing into professional chef territory, but it’s actually easy and fun once you try it. I find it easier than rolls, and it’s satisfying to master the simple techniques that restaurants charge so much for. You do need two things to make this work: genuinely fresh, sashimi-grade tuna from a source you trust and a very sharp knife.
The fish cutting and sushi rice shaping techniques matters, but I’ve included step-by-step photos and a video to walk you through slicing and shaping. You’ll find that the rhythm comes quickly. It feels less like a recipe and more like a ritual. I hope you’ll agree!
Table of Contents
Recipe at a Glance
- Hands-on time: 30 minutes
- Total time: 55 minutes
- Yield: 10 pieces
- Skill level: Beginner-friendly
- Bonus: No special tools required
Tuna Nigiri Ingredients
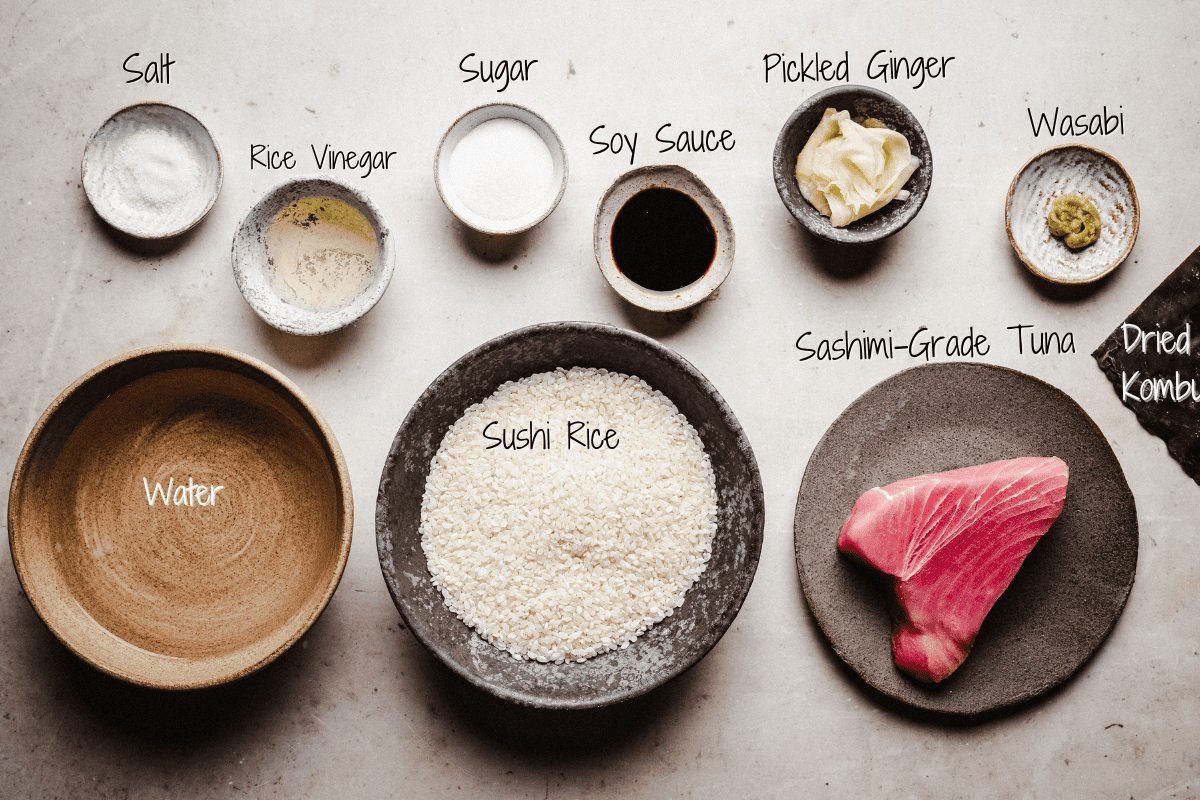
For the Sushi Rice:
- Sushi Rice: Short-grain white rice with a higher starch content than regular rice that’s stickier and easy to shape for sushi. Look for a package that specifically says “sushi rice”.
- Water: Use filtered water if possible.
- Rice Vinegar: Look for unseasoned rice vinegar, not the “seasoned” version that already has added sugar and salt.
- Granulated Sugar or Honey: Either works well to balance the vinegar. I’ve tried both with good results.
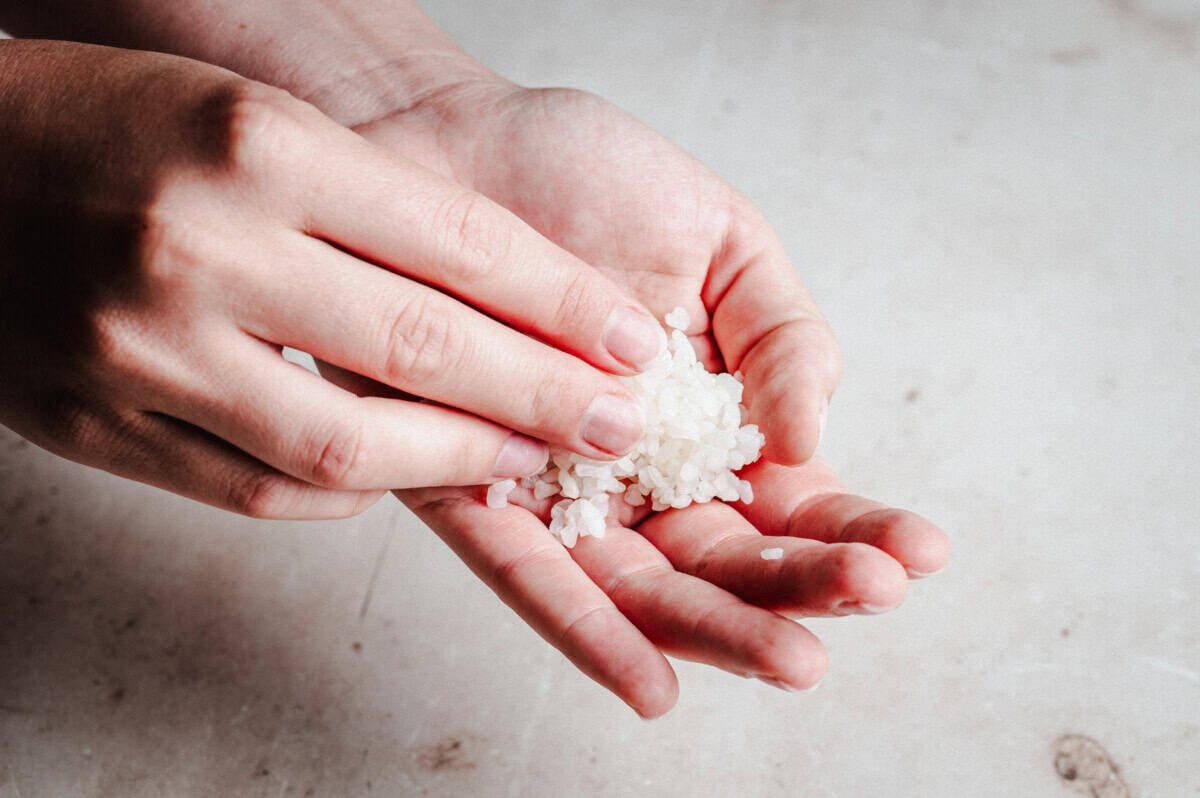
- Fine Sea Salt: I like fine sea salt for this because it dissolves quickly and has better flavor than standard table salt.
- Dried Kombu: You’ll find this in Asian markets or on the international aisles of many grocery stores. No worries if the kombu is in strips instead of squares, just use 2 or 3 strips instead.
For Making the Nigiri:
- Sashimi-Grade Tuna: Your fish has to be fresh enough for raw eating. Look for bright red color and ask your fish seller specifically for sushi-grade fish.
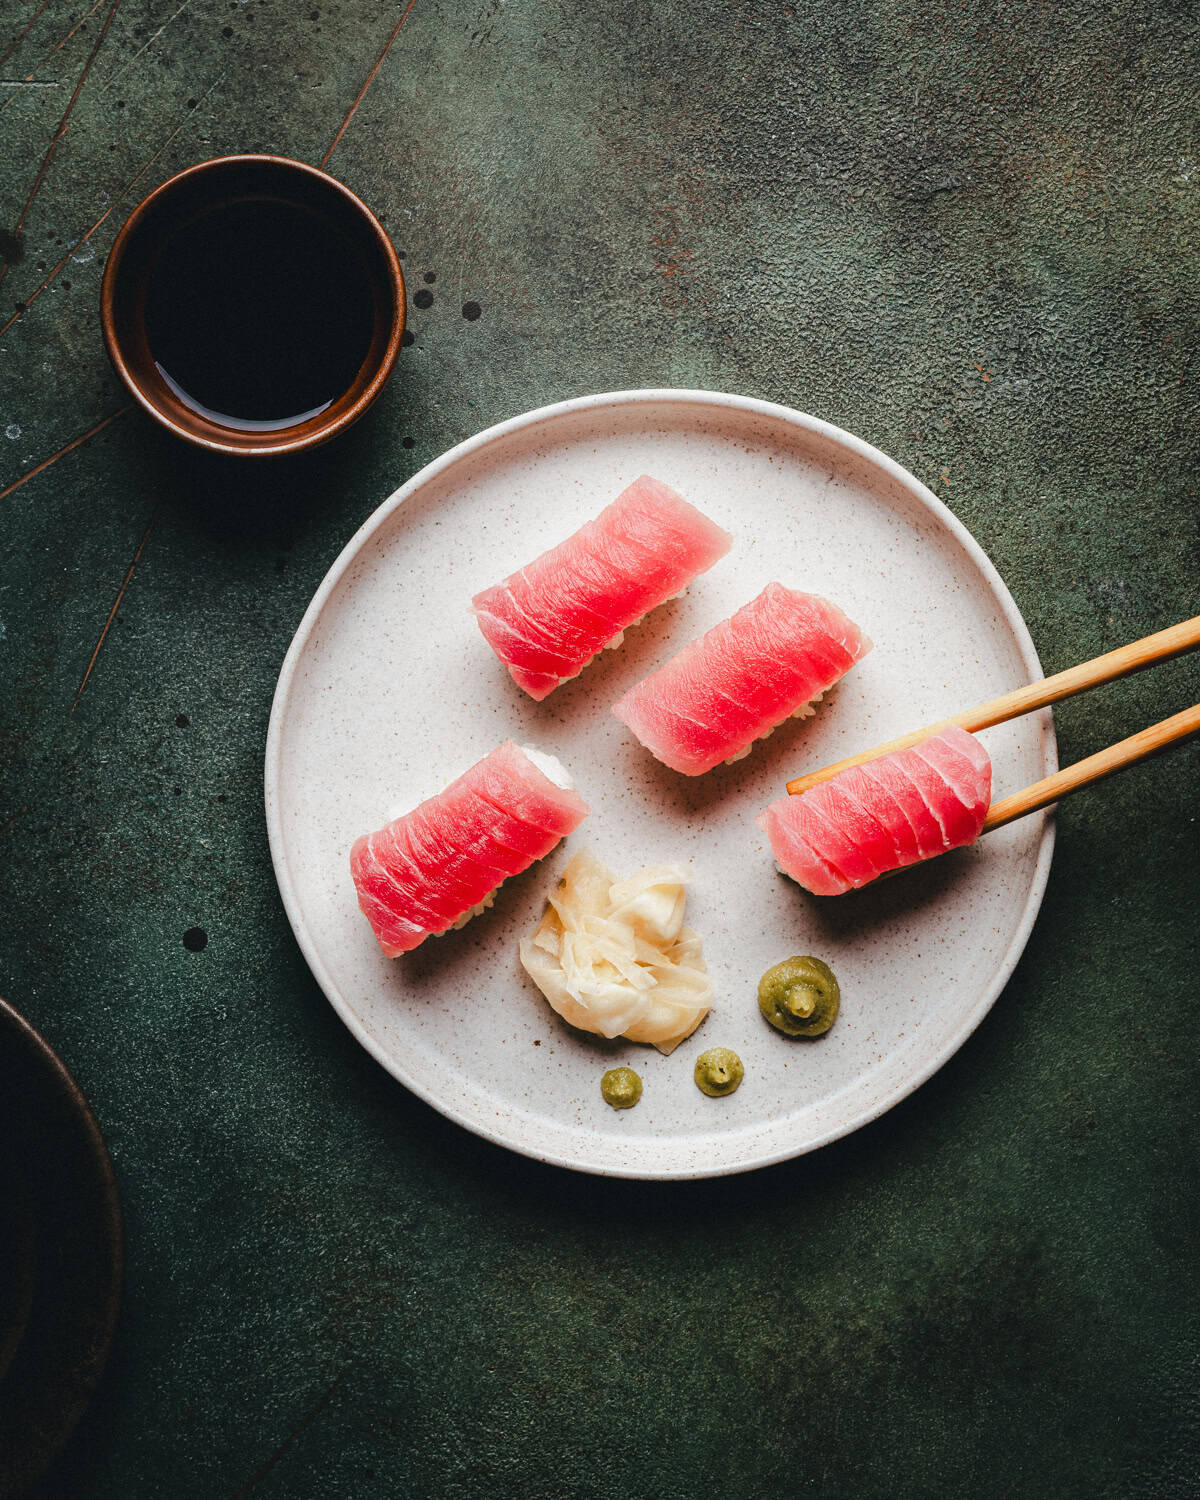
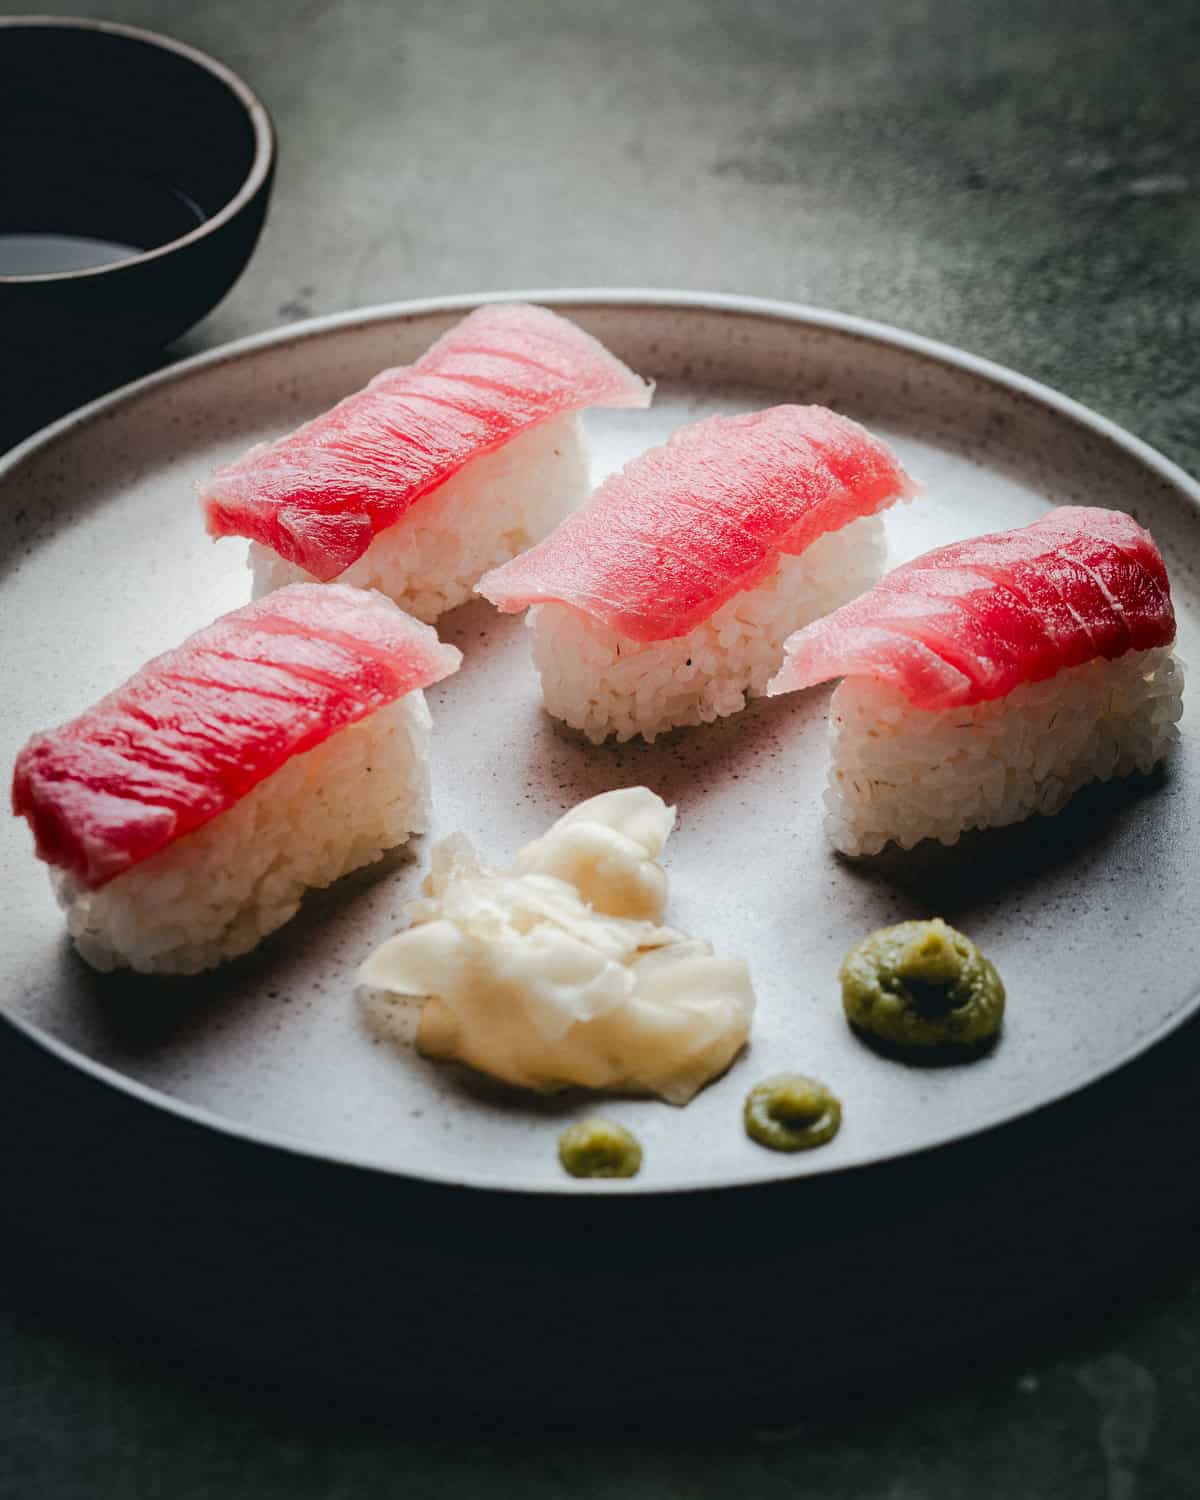
- Wasabi: The tubes of prepared wasabi are great for home sushi making and keep well in the refrigerator.
- Pickled Ginger: The natural versions have a better flavor than the bright pink artificially colored ones. You’ll find this in small jars in the Asian food section – it looks like thin, translucent pink or pale yellow-pink slices.
- Soy Sauce: A good-quality soy sauce for dipping is a must. I look for one that’s naturally brewed with a balanced flavor that complements the tuna without overpowering it.
Why This Recipe Works
- Balanced proportions: ~15g rice and 15–18g tuna per piece keeps the bite clean and proportional.
- Grain-aware slicing: Cutting against the grain keeps each bite tender and easy to chew.
- Flavor layering: The mild acidity of the rice sets up the richness of the tuna.
- Shaping for stick: Damp hands and light wasabi help bond the rice and fish.
How to Make Tuna Nigiri
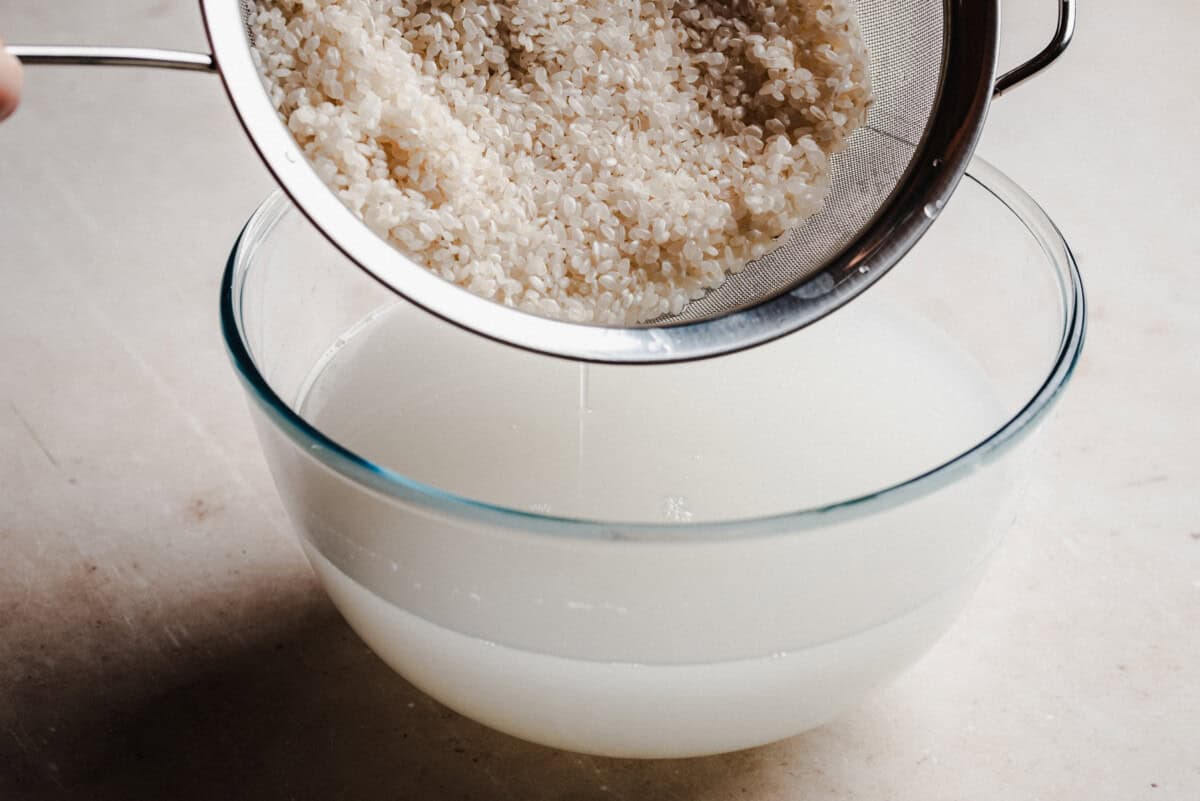
1. Make the sushi rice
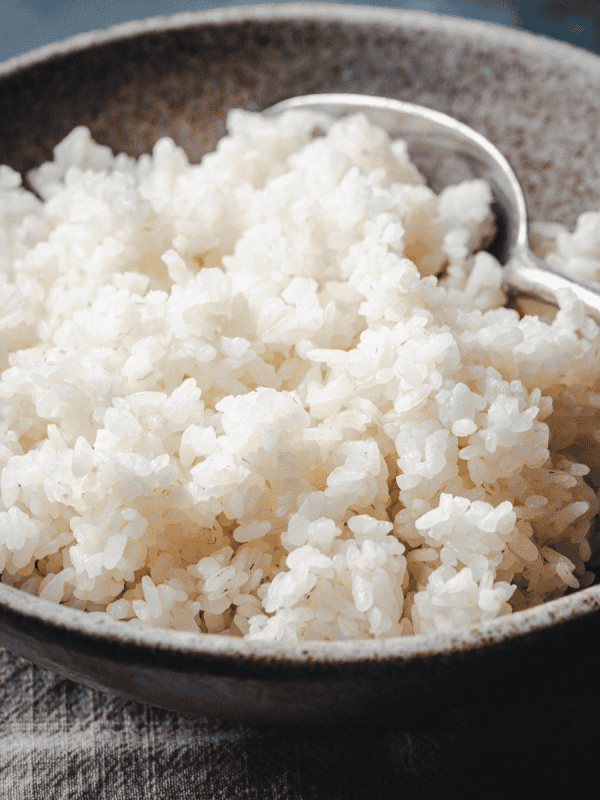
Rinse the rice until water runs clear, soak for 15 minutes, then cook with kombu. Steam, then season with vinegar mix. Let cool, covered with a damp towel.
2. Slice the tuna
Keep it cold. Use a sharp knife to trim dark areas or sinew, then slice across the grain into thin, even pieces (~1/4 inch thick, 2–2.5 inches long).


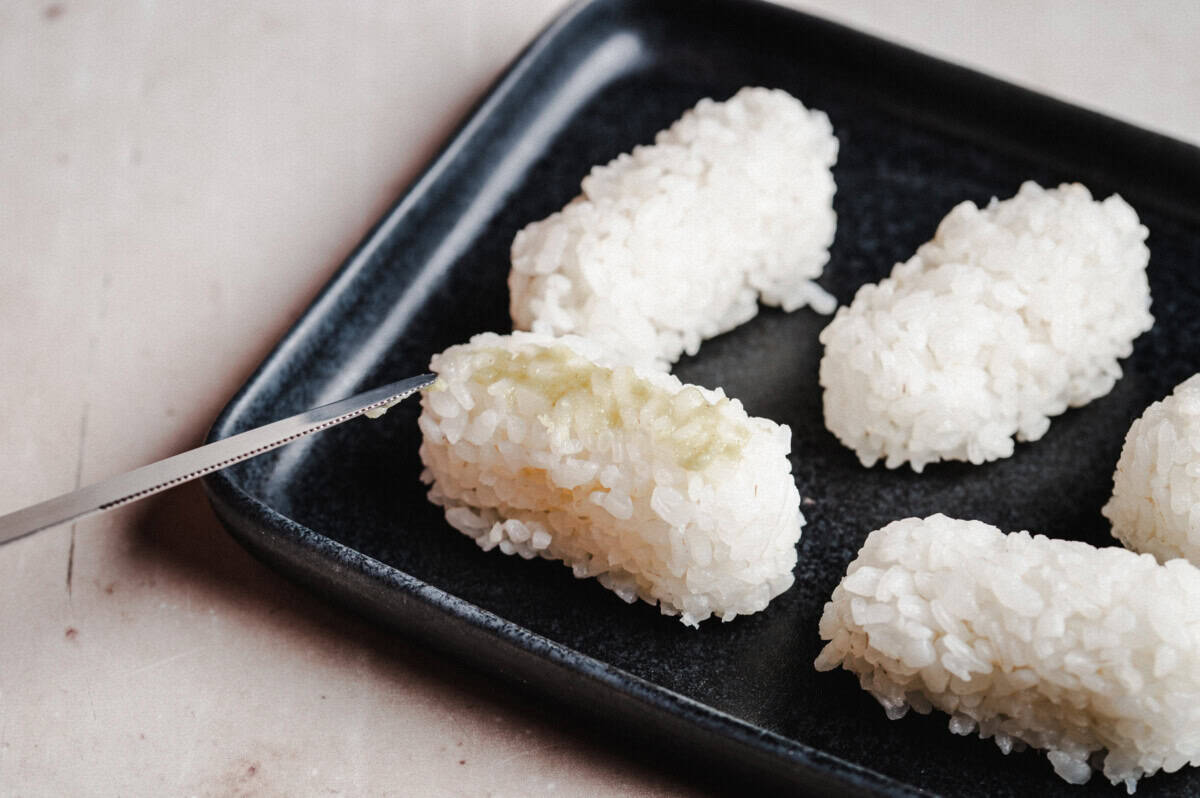
3. Shape and assemble
Wet hands. Shape 1 tbsp of rice into an oval. Dab wasabi on top if using. Lay a slice of tuna over, press gently to adhere. Serve immediately.

Pro Tips
- Keep Everything Cold: Refrigerate the tuna until just before slicing. Cold fish is much easier to cut cleanly than fish at room temperature.
- Knife Matters: Use your sharpest knife for slicing the tuna. A dull blade will tear the fish instead of cutting it cleanly.
- One Motion Slicing: Try to cut each slice of tuna in a single, smooth motion rather than sawing back and forth. This gives the cleanest edge for the most professional-looking presentation.
- Wet Your Hands: Keep a small bowl of water with a splash of rice vinegar nearby to wet your hands before handling the rice. This prevents sticking and adds a subtle flavor.
- The Right Pressure: When forming the rice mounds, use gentle pressure. Squeezing too hard compacts the rice and makes the nigiri dense and chewy rather than tender.
- Serve Immediately: Nigiri is at its best when you serve it right away. The rice can dry out and the fish texture changes if left at room temperature too long.
Recipe Variations
- Add a Topping: While traditional tuna nigiri is simple, feel free to top it with a thin slice of avocado for extra creaminess or a small sprinkle of sesame seeds for crunch.
- Make It Spicy: If you like some heat, add a drizzle of spicy mayo (a mix of mayo and sriracha) on top of your tuna.
- No Kombu Option: If you can’t find kombu, you can still make excellent sushi rice without it. The difference is subtle and the rice will still work well for nigiri.
- Dipping Sauce Options: While soy sauce is classic, try a light ponzu sauce for a citrusy kick or a tamari-based soy sauce for a gluten-free option.
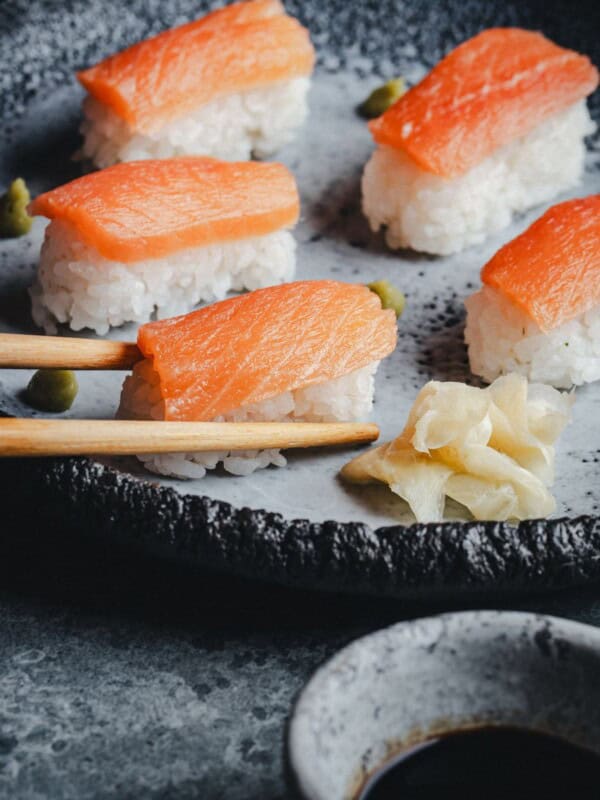
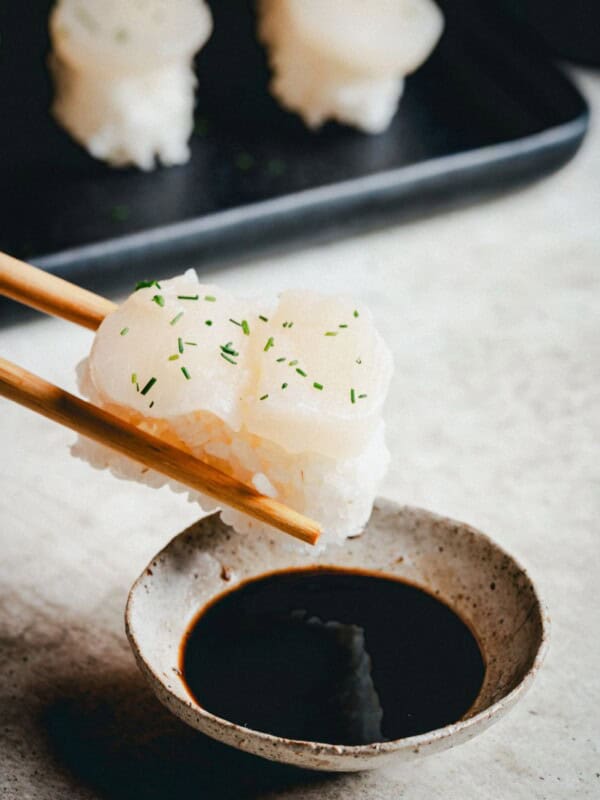
- Create a Nigiri Variety: Mix things up with a variety of nigiri options. Salmon Nigiri and Scallop Nigiri are two of my other favorites.
Make-Ahead and Storage
- Tuna nigiri is best fresh, but leftovers can be refrigerated for up to 24 hours. Place on a plate and cover loosely with plastic wrap or wax paper. After that, the rice loses its texture and the tuna won’t taste as fresh.
- Sushi rice (same day): Keep at room temp, covered with a damp towel, for up to 4 hours. Don’t refrigerate; it dries out and hardens.
- Sushi rice (longer term): Freeze in an airtight container for up to 1 month. Defrost at room temp or microwave gently with a damp paper towel. It may be slightly less sticky but still usable.
FAQ
Look for “sushi-grade” or “sashimi-grade,” ideally flash-frozen at −20°C for 7 days or −35°C for 15 hours to kill parasites.
About 30 degrees, against the grain, using a single smooth stroke.
About 15 grams each. This keeps the ratio balanced without overwhelming either texture.
Yes, up to 4 hours ahead. Just keep it covered with a damp towel and never refrigerate.
It might be too dry, overmixed, or handled too much. Use damp hands and shape gently without packing.
Making Tuna Nigiri at home connects you to one of the world’s most elegant food traditions in a surprisingly approachable way. I enjoy the quiet rhythm of the process – the careful slicing, the gentle shaping of rice, the precise assembly. At the risk of sounding “new-agey,” it feels almost meditative. The real reward comes with that first bite. Once you’ve made your own nigiri, you’ll wonder why you ever thought this was something only restaurants could pull off.
More Easy Sushi Recipes
Tuna Nigiri

Video
Ingredients
For the Sushi Rice
- 1 1/2 cups sushi rice (short-grain white rice)
- 1 2/3 cups water
- 3 tablespoons rice vinegar
- 4 teaspoons granulated sugar or 1 tablespoon honey
- 3/4 teaspoon fine sea salt
- 1 piece dried kombu 4-by-4-inch piece
For Making the Nigiri
- 1/2 pound sashimi-grade tuna
- wasabi to taste
- pickled ginger for serving
- soy sauce for serving
Instructions
To Make the Sushi Rice
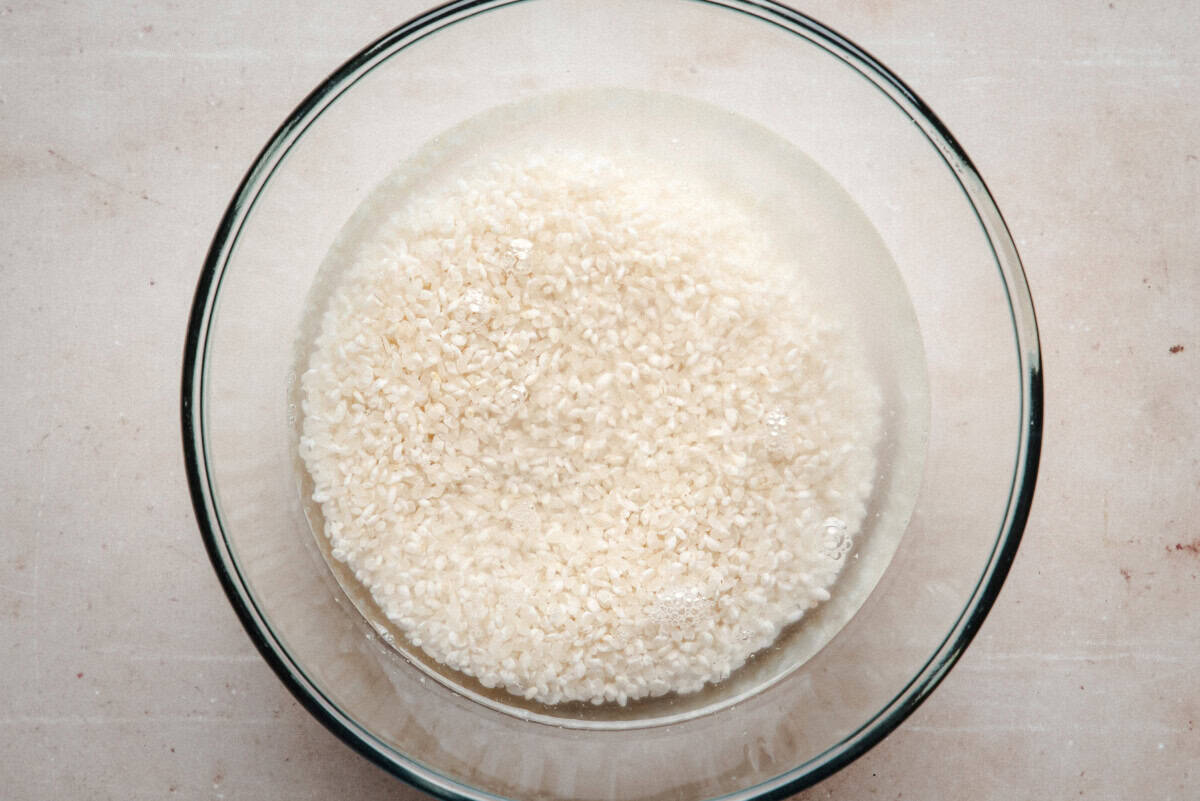
- Place the rice in a fine-mesh strainer set over a bowl. Rinse under cool water, stirring gently with your fingers. Once the bowl fills with cloudy water, lift the strainer and pour it out. Repeat this process, refreshing the water each time, until it runs clear.
- Transfer the rinsed rice to a medium bowl and add the measured water. Let it soak at room temperature for 15 minutes.
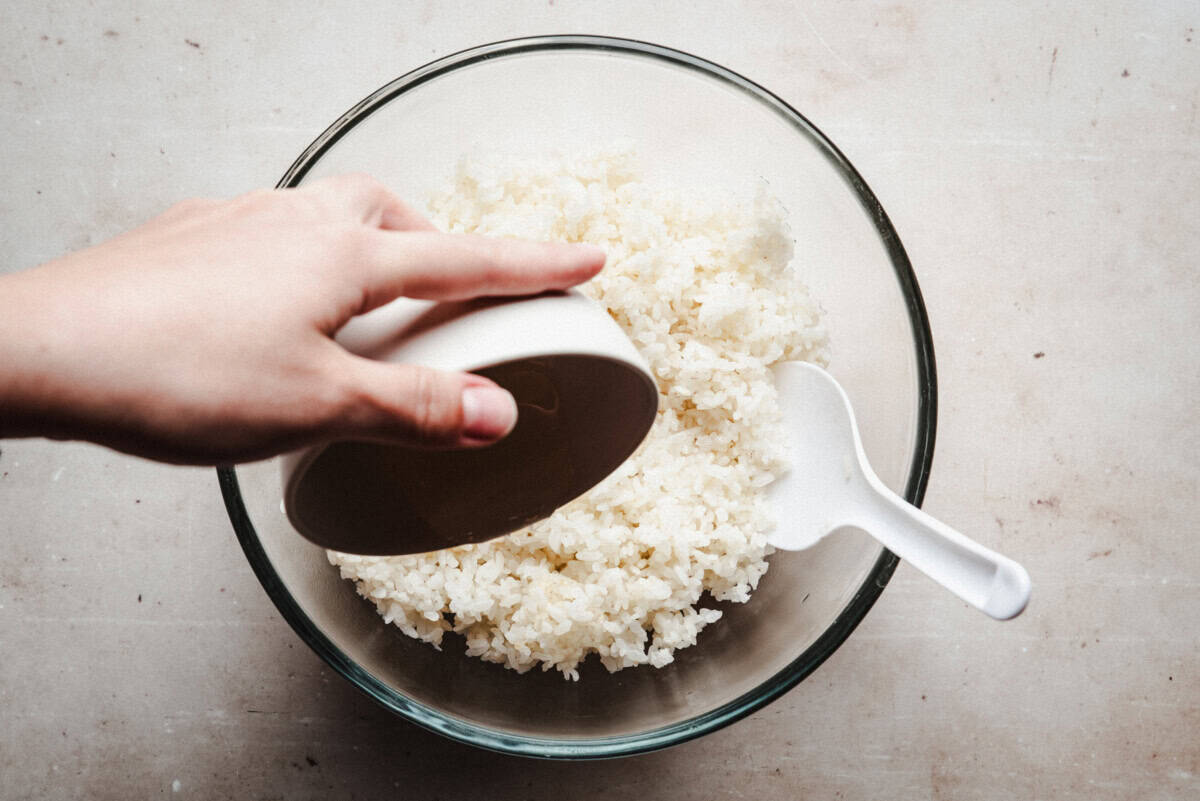
- While the rice soaks, stir together the rice vinegar, sugar, and salt in a small bowl until fully dissolved; set aside.
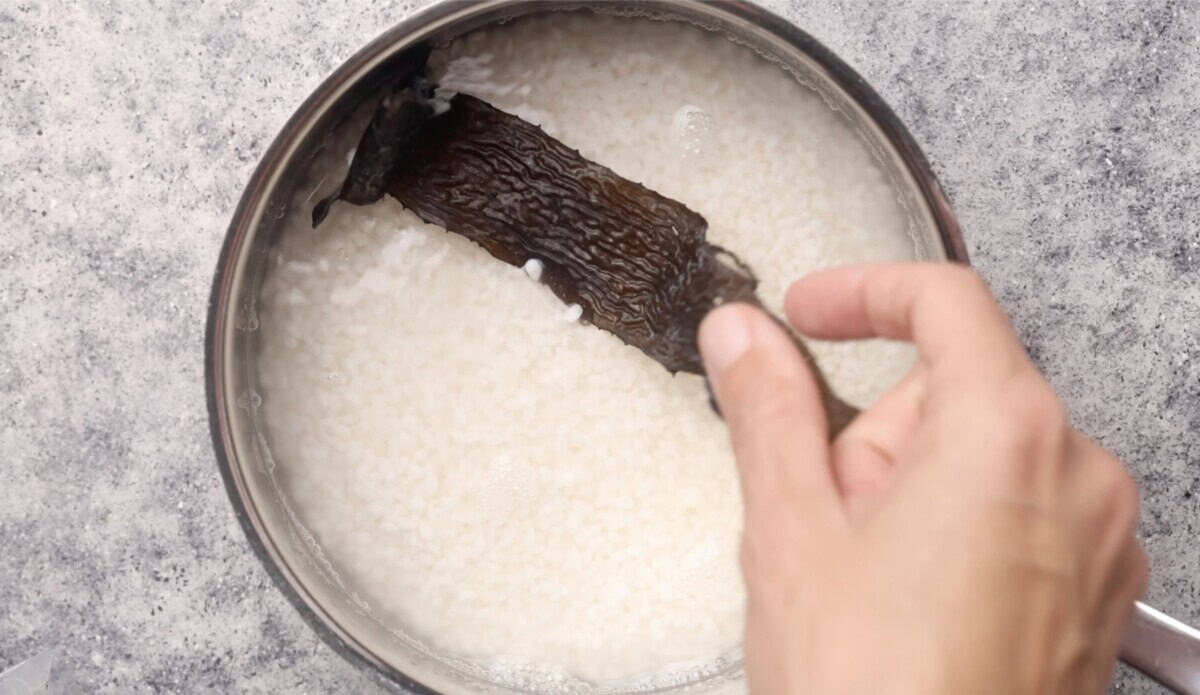
- Pour the rice and its soaking water into a heavy-bottomed saucepan. Add the piece of kombu, cover, and bring to a boil over high heat. As soon as it boils, reduce the heat to low and cook for 10 minutes. Once the water is absorbed, take the pot off the heat, place a clean kitchen towel between the lid and the pan, and let it steam for 10 minutes.
- Remove and discard the kombu. Transfer the rice to a wide bowl and drizzle with the vinegar mixture. Use a rice paddle to gently fold it through the hot rice, being careful not to press or stir too hard. Cover the bowl with a damp cloth and let the rice cool to room temperature before forming your nigiri.
To Make the Tuna Nigiri
- Start with sashimi-grade tuna and keep it cold until you're ready to slice. If there’s any sinew or dark bloodline, trim it away. It can be tough or have an overly strong flavor. Using a very sharp knife, slice across the grain into pieces about ¼ inch thick. Angle the knife slightly and use a smooth, single motion for each cut. The slices should be 2 to 2½ inches long, just enough to cover the rice without hanging too far over the sides.
- Wet your hands and scoop a heaping tablespoon of sushi rice into your palm. Gently shape it into an oval mound, something close to a slightly flattened football.
- Spread a small amount of wasabi on the rice, if using, then lay a slice of tuna over the top. Lightly press the fish onto the rice so it holds together without compressing the shape. Place on a serving plate.
- Repeat with the remaining rice, wasabi, and tuna. Add a few slices of pickled ginger to the corner of the plate or serve in a small dish alongside, and offer a shallow bowl of soy sauce for dipping. Serve right away.
Notes
- Use sashimi-grade tuna from a trusted source. Look for bright color and firm texture.
- A sharp knife makes all the difference for clean, even slices.
- If you can’t find kombu, skip it; your sushi rice will still turn out well.
- Wet your hands with water and a splash of vinegar to keep rice from sticking.
- Store leftover nigiri in the refrigerator for up to 24 hours. Best enjoyed fresh, but still good the next day.
Nutrition
Nutrition information is automatically calculated, so should only be used as an approximation.